


By: Xappa
Hello everyone and Happy Mothers’ Day to all the mommies near and far! My mom lives far away in a land called California, where they have lots of foliage and they can walk around outside during the day. Isn’t that weird? Well, it is to me because it’s a bazillion degrees here in devils armpit Arizona, but I digress. My mom has always been a creative person, and has always been incredibly supportive of my brother and I throughout all of our creative endeavors. She taught me the basics on how to sew. She helped me make my first dress, she showed me how to keep things organized (still working on that), taught me how to be professional in my business dealings, helped me and made things along side me for my first ever craft fair in 1998, and has always been someone I could go to for anything no matter how bad I thought it was. I’m so grateful for her and everything she’s done for us. I look forward to spending more time with her and my dad as they settle into retirement.
Right now my folks are in the middle of fixing up their house to sell it and sizing down to a more manageable space at the end of the year. They’ll be spending the fall/ winter months here in the desert and the spring/summer in California. The space they’re moving into in California is quite small but, knowing my parents they probably already have ideas on how they’ll transform the space. My mom’s aesthetic as of late has been a more modern eclectic feel. I thought that I’d make her some adorable pot holders to brighten up the new kitchen and that she’ll think of me when she’s baking her delicious banana bread. If you’re reading this mom, send me some!
Here’s a quick little tutorial on how to make some using the 2 1/2″ Strip Cutter Fab Die.
Things you’ll need:
Fabric – Enough to cut strips from and end up with (2) 8″ x 8″ squares and a 4″ x 2″ rectangle for the hanging loop
Insulbrite
Contrasting thread
How you make it:
Step 1: Prep your fabrics by ironing them flat then cut your strips out using the cutter and your die machine.
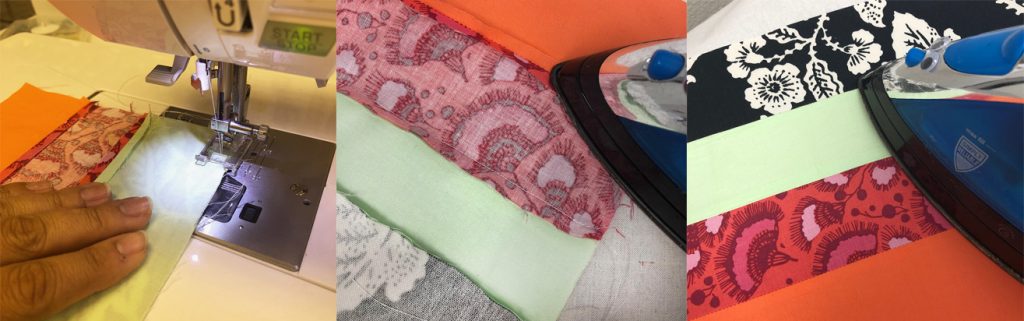
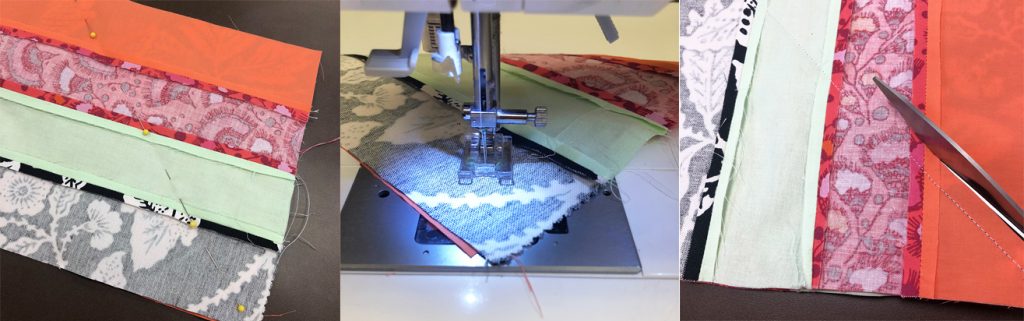
Step 2: Sew your strips together and press seams flat.
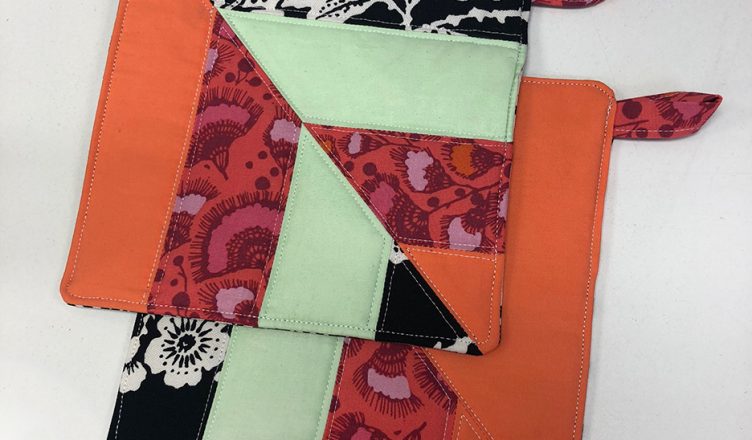
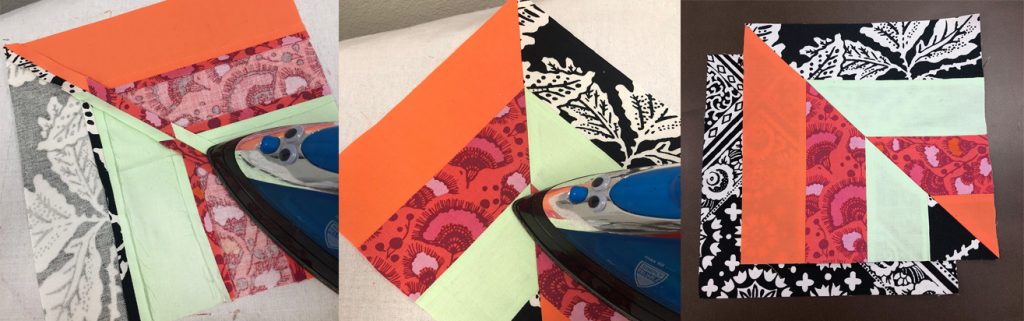
Step 3: Cut your 8″ x 8″ squares out, including your insulbrite. I did a diagonal cut then rearranged it and sewed it together to make it a little more funky but, you do you. Set them aside.
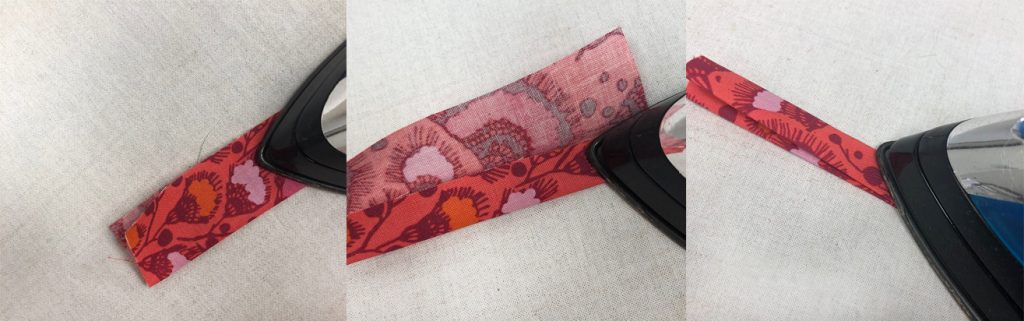
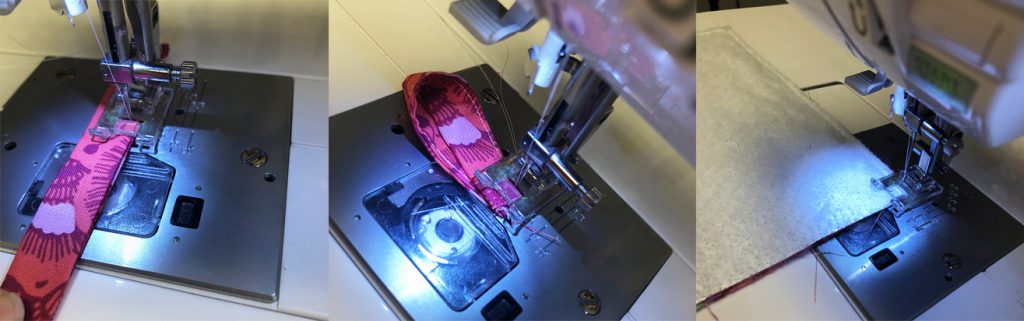
Step 4: Take your 4″ x 2″ rectangle and Iron in half, wrong sides facing in, then fold the sides again and iron shut. Sew shut close to the edge. Fold your loop onto itself and sew together and set it aside.
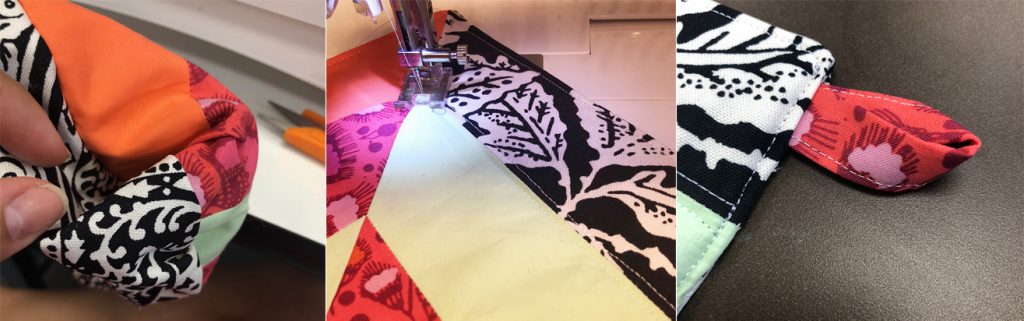
Step 6: Sew your squares together good sides facing in with the Insulbrite on the back of one of the squares. Leave a 2 inch opening close to one of the corners. This will be where you flip the fabric inside out and where you put your loop. Once you’ve pulled your fabric right side out and pushed out all the corners, give it a good ironing so it’ll be easier to sew. Place your loop in the opening of your potholder about 1/2″ in and stitch shut going around the entire edge of the potholder. I added more stitching to secure and highlight the shapes in the pattern. Press to secure the stitches and you’re done!
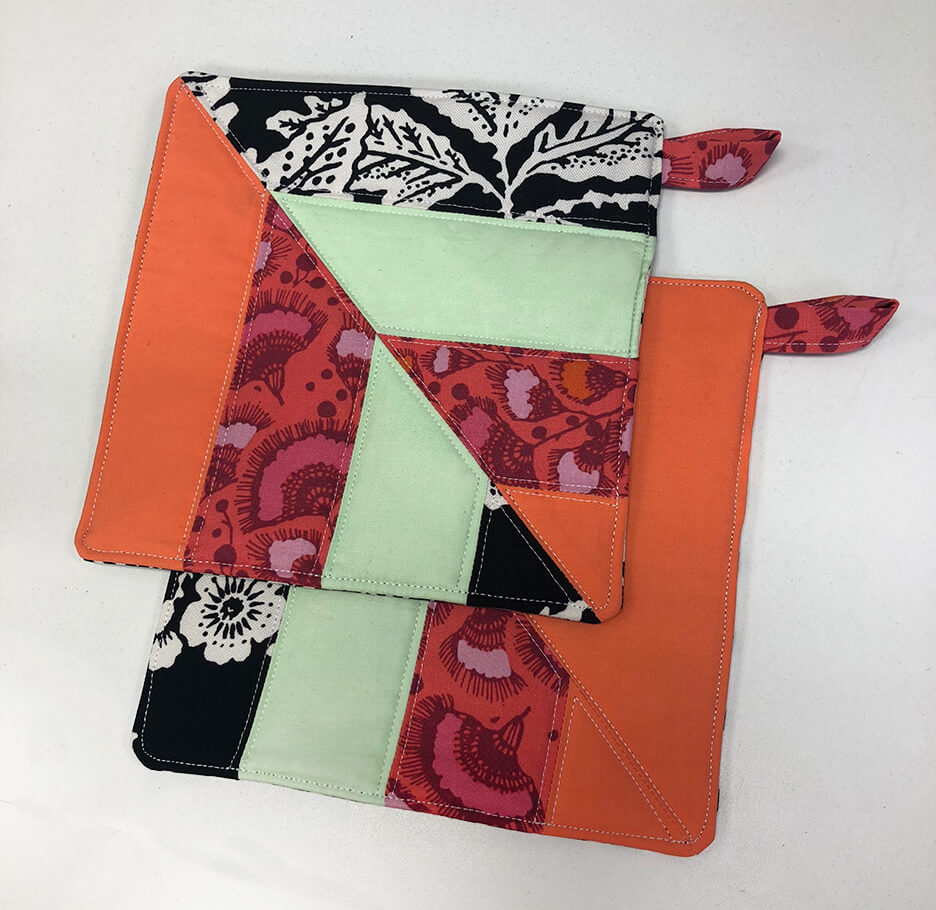
I made another one using the other half of the triangle I cut off. I think my mommy will approve! I would love to see your version of this or any other fun projects you’ve made! Message us to have your Crafter’s Edge project featured. If you’re not already, follow us on all the social media platforms! Links at the top of the page.
Have a lovely weekend and stay crafty my friends!
-Xappa


As I look through your dies it would be nice to know the sizis of the squares, rectangles, circles, etc to know if those are the sizes I would use. In other words a description of what is included in the pack. Also the machine….what is included with it and do I NEED any other products to use it?????? I would appreciate any info you could give me….thanks in advance…..pat….
Hello Pat! Thank you for your question. If you go to the website and hover over the products with your mouse a “quick view” button will appear, you’ll click on that. The die set the dimensions are all listed in the description. As for the Crossover 2, the machine comes with the cutting plate sandwich. The only other tool I would recommend would be the tweezers here:http://craftersedge.com/Tweezers/. If you’re getting any of the EPP sets or any appliques with smaller pieces the tweezers make it easier to remove your fabric/paper pieces from the dies. I hope this is helpful. If you have any questions in the future feel free to contact customer service via email at: support@craftersedge.com Thank you!