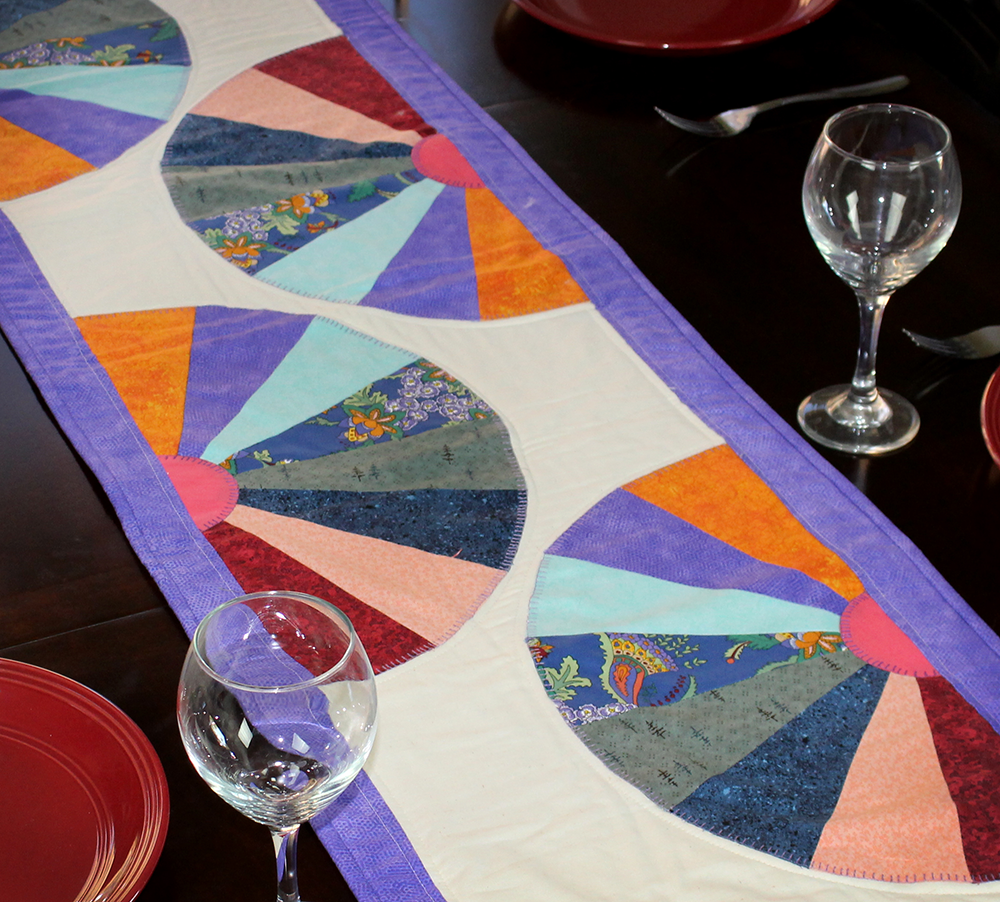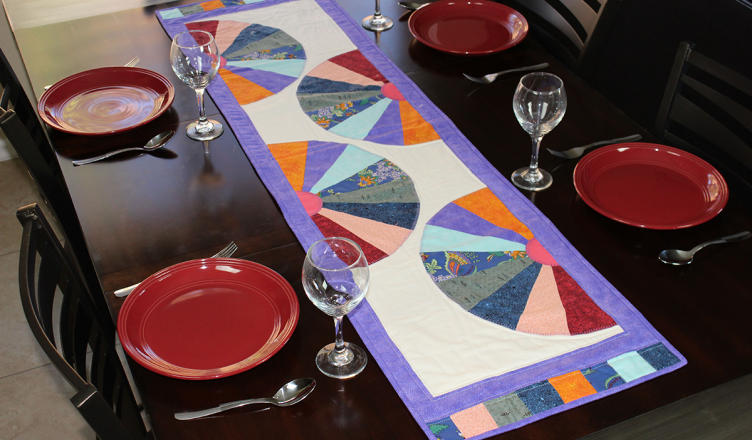
You’ll have an absolute blast putting this table runner together, and with just slight additions or changes; it can fit any table size. Enjoy! Download full PDF Tutorial here.
Supplies:
»Die Cutting Machine
»Grandmother’s Fan, Square & Circle Fab Dies
»Sewing Machine
»Thread To Match Or Coordinate With Your Selected Fabric
»Hand Sewing Needle
»Fusible Web
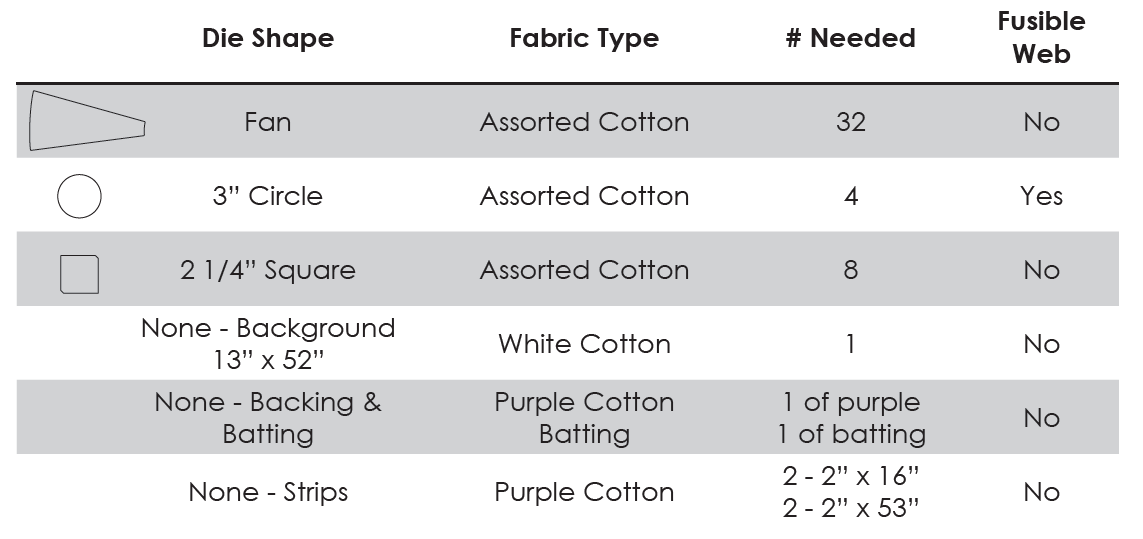
»Cotton Fabric (see chart below)
»Batting
»Bias Edging
Instructions:
1. Select and cut your fabrics. Refer to the chart below for fabric and fusible web needs. To cut two of one shape, fold the fabric with the right sides together. Cut your fabric and fusible web to roughly the size of the die. Place the flat side of the die on the white base plate and your fabric/fusible web layers on top of the die. Put the metal plate on top of your fabric and sandwich it all together with the clear cutting plate. Adjust the roller width on your die cutting machine as needed and roll the plates through the machine twice (forward and back one time each).
2. Create and stitch your fans. Sew 8 fan shapes together with 1/4” seams. Repeat three more times to create four half fans. Once your half fans are sewn, press open your seams. Place them on your background white cotton, evenly spaced across the length. Pin and stitch around each fan shape with a blanket stitch.
3. Apply your fan centers. Layer your circle shape with fusible web underneath and cut in half. Place over the bottom of each fan shape, lining up the flat edge of the circle with the flat side of the half fan. Press for 10 seconds to activate the fusible web. Stitch around the circle with a blanket stitch.
4. Build out your top. Pin your 2” x 53” strips to the top and bottom of your background with the right sides together. Stitch with a straight stitch and a 1/4” seam then press your seams open. Pin your 2” x 16” strips to the sides of your background (on top of the strips you just sewed) with the right sides together and stitch with a straight stitch and 1/4” seam then press your seams open. Sew 8 of your squares together into a row with a straight stitch and a 1/4” seam then press the seams open. Repeat for another row of 8. Then pin your square rows to the right side of your 2” x 16” strips and sew with a straight stitch and 1/4” seam; press the seams open.
5. Finishing. Layer your pieces so you have your top, a layer of batting and the backing with the wrong sides of your fabric against your batting. Quilt as desired. Using binding of your choice, bind the edges of your table runner together.
We would love to see your latest creations and hear any ideas you may have for our next projects. Share your place-mats and ideas with us online!
Tables come in different lengths and shapes – feel free to add a fan, remove a fan or add wider strips/squares to build a larger table runner. The choice is yours!
Happy Quilting,
Laura H.