Well everyone, we made it to the end of 2017. The holiday season is in full swing and you have Christmas to plan for. Start Panicking! Just kidding! Do the opposite because Crafter’s Edge has you covered with our 10 Days of Handmade Christmas. We will be bringing you ten days of inspiration with everything from home décor, to gifts, even the paper the gifts are wrapped in and the card that goes with it. We’ve got you covered. So please, Stop panicking. That was a joke! Relax and let our handmade guide get you into the calming Christmas Spirit.
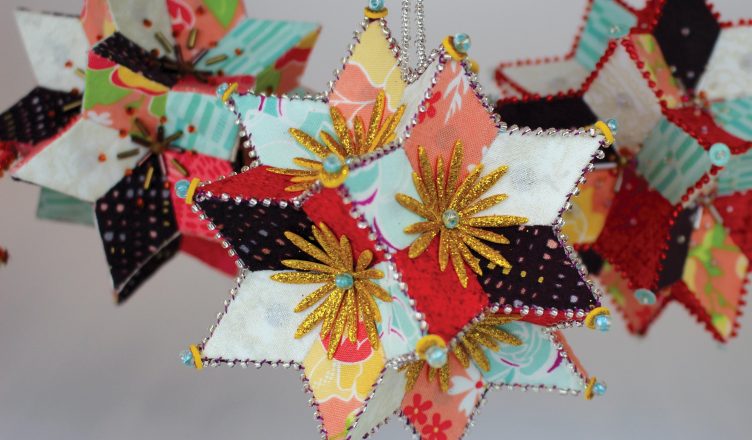
Something that has always been a part of that Christmas spirit for me, is passed down ornaments. Getting out all our decorations and unboxing precious memories. We have some that my late great grandmother made and it brings me so much joy to see them every year. I wanted to make my own ornament this year to add to our family’s collection. I went looking on Pinterest, as many of us do, and I found these amazing English paper piecing ornaments. I love geometric patterns so it caught my eye (and didn’t. let. go.) I just had to make my own.

These stars take a lot of patience, but I think it is well worth the finished product since it will hopefully be passed down. I made a few, and through that process I have found some helpful tips for you all. This way you don’t start to panic again. Just follow these simple steps for smooth sailing.
TIP ONE: Use the Crafters Edge Diamond E.P.P. die set. It truly makes this project immensely faster. And the faster these pieces can be created the more time there is to be creative without losing patience. Because let’s face it, they are right. Patience is key, and no one has extra of either this month. Did I mention there are 60 individual diamond shapes to make this star? No? Well there are 60. Theses dies saved me so much time.
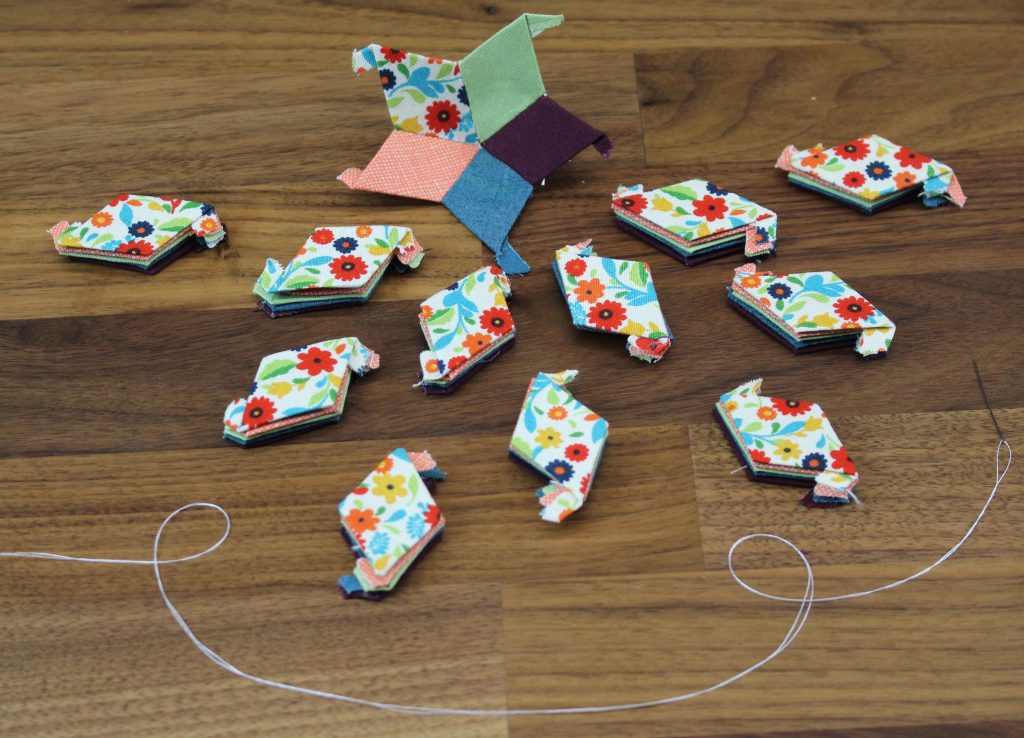
TIP TWO: Traditional English paper piecing would have you baste your individual pieces with a needle and thread. Since I wanted the star to be sturdy, I found it best to use card stock and a layer of fusible web. This way your fabric is completely adhered to your paper and has less chance of fraying.
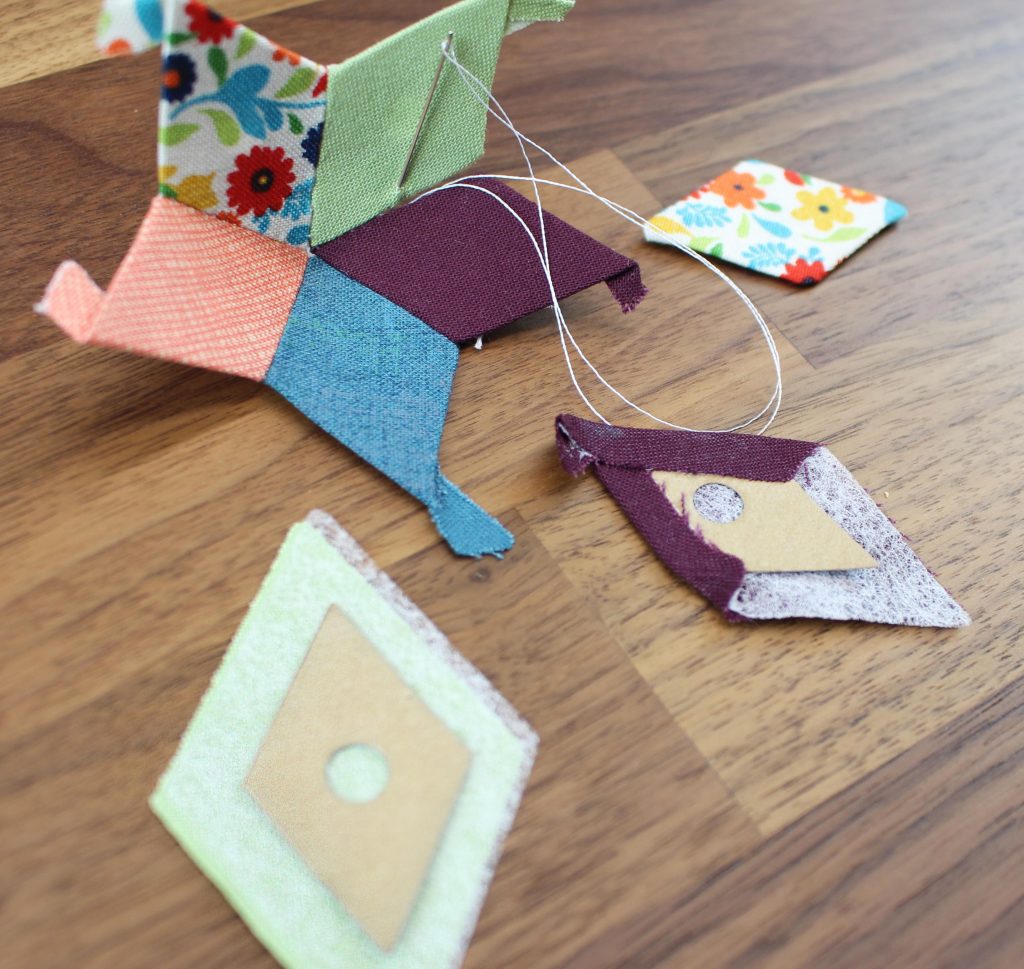
TIP THREE: A sharp needle! It is so important to have a sharp, thin needle for all this hand sewing. And with that sharp needle; a good thimble. Your stitches will be more precise the thinner and sharper the needle. It also helps because with the layer of fusible web and cardstock, your edges might be a little tough. I even used a sturdy beading needle I had and found that worked well.
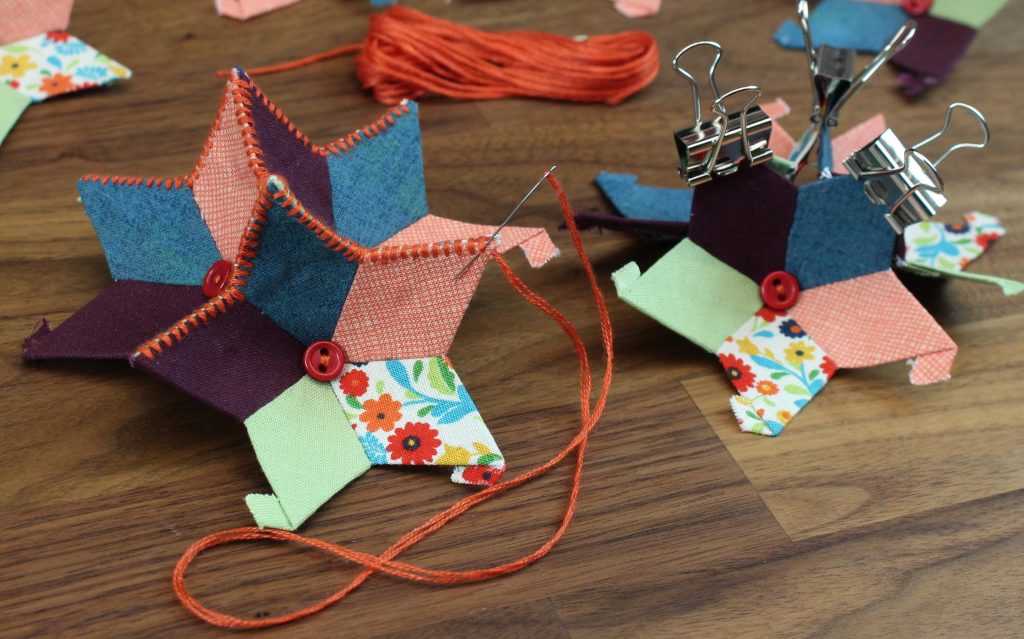
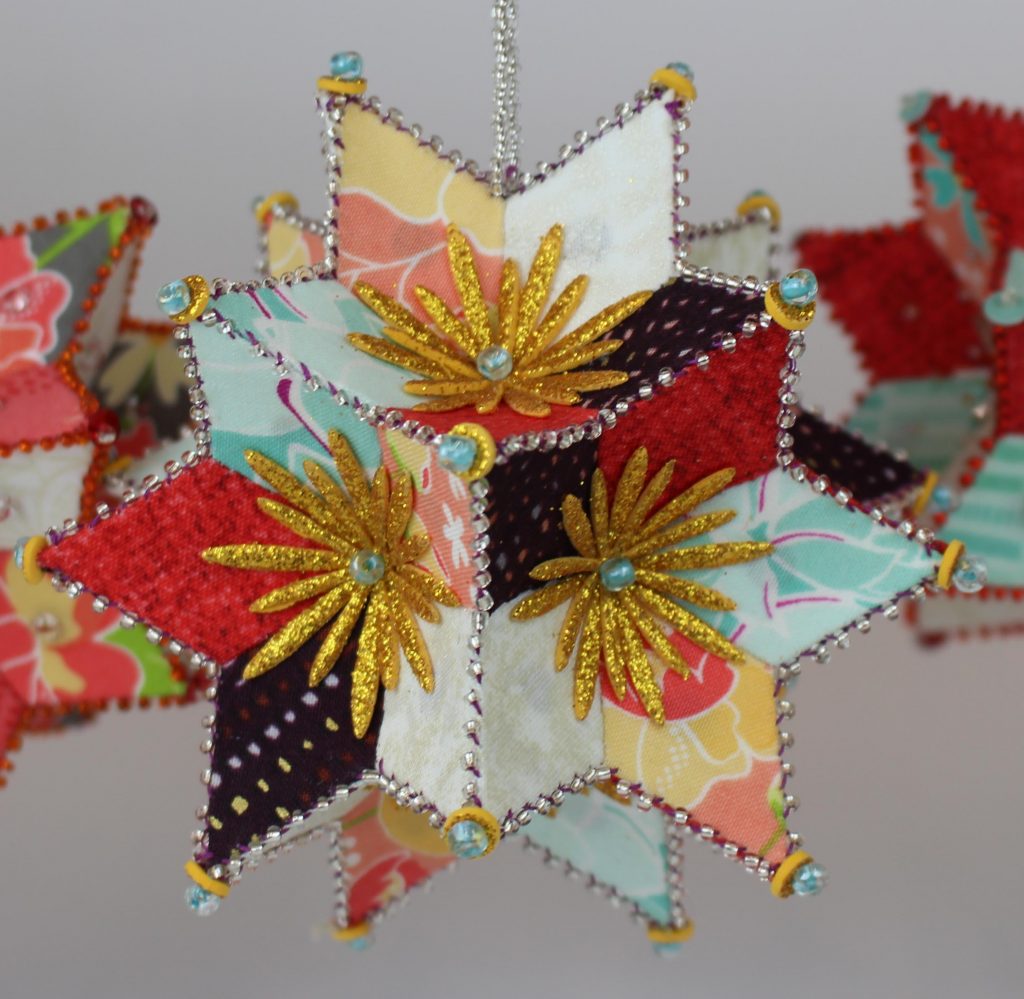
TIP FOUR: Use binder clips to keep your pieces together as you sew them with MONOFILAMENT thread. Did you catch that? Monofilament thread, humans! This will make your stitches harder to see. Which is good because, without monofilament thread you might want to cover your edged with glitter or seed beads (like I did on my first attempt). Which I did find to make the stars even more charming. I waited till my last star to use it. Do not be like me folks. Get it first!
TIP FIVE: Keep yourself relaxed while sewing your star pieces by listening to your favorite Christmas songs. Put on your favorite holiday movie even though you have seen it a thousand times and your family all hate it. You can even sit down in front of your open fire place with some grape juice (ehhemm, *wink*) and sew until your heart is happy.

I hope these tips help you make these delightful little stars and get you into the season’s spirit. They do take a little while, so I would start on these sooner rather than later. That way you can also post and gloat about how awesome it came out. Maybe Inspire another craft master to make their own. Be sure to check back tomorrow for day Two of our Handmade Christmas.
Thanks for stopping by!