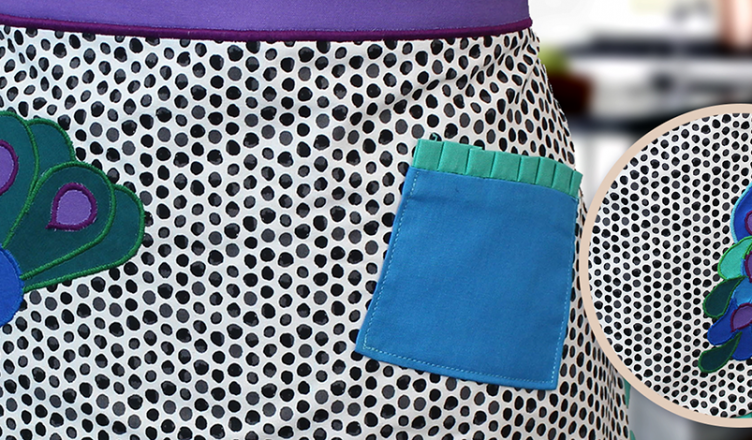
Take your cooking attire to the next level with this beautiful, easy-to-make peacock “half” apron! You’ll be the cutest chef around. Download full pdf tutorial here for quick reference at home.
Supplies
Die Cutting Machine
Fabric
A1091 Fab Dies
Iron
Fusible Web
Sewing Machine
Thread
Scissors
Pins
Instructions
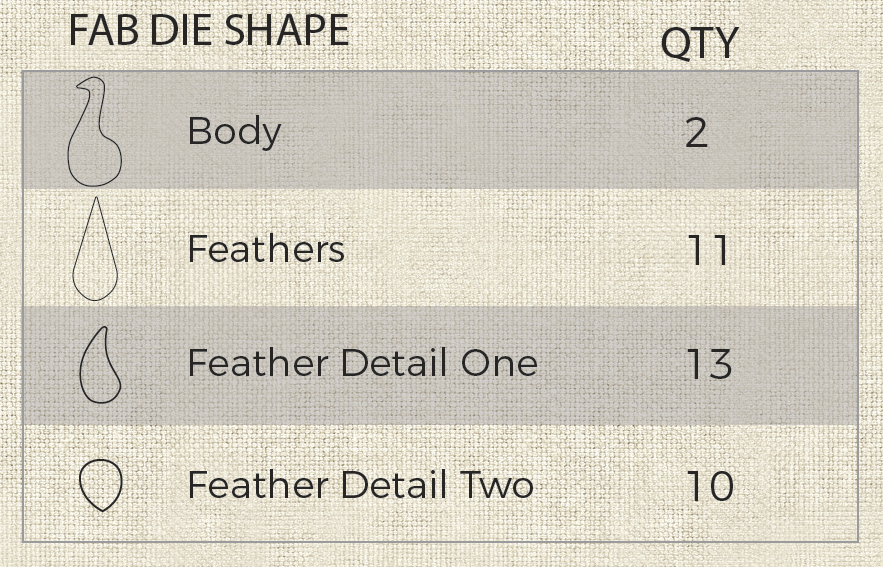
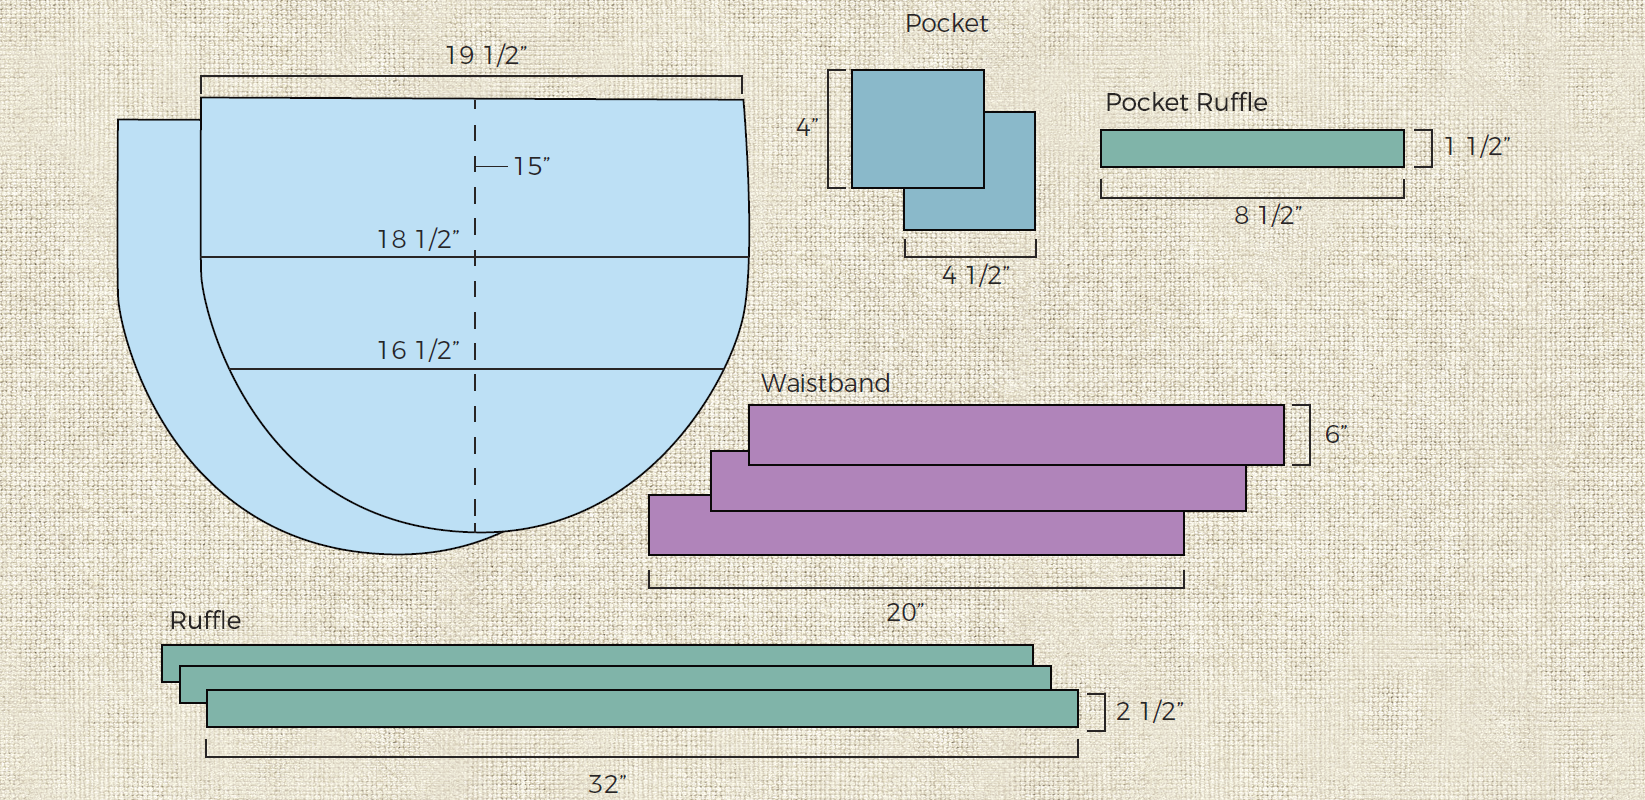
1. Select and cut your appliqué fabrics. Refer to the chart above for the shapes you need for this project. Follow your machine instructions on die cutting or refer to our website for more information.
2. Select and cut your base fabrics. Refer to the pattern on the back to cut the base fabrics you will need to make your apron.
3. Arrange, iron and sew your appliqués. Take the front apron skirt shape and arrange your peacock appliqué on the face side. Iron for ten seconds on medium heat to activate your fusible web. To secure the peacock, use a desired stitch around the edges of the shapes.
4. Create your Pocket. Gather the pieces you cut for the pocket. Take the 2½” x 8½” strip, fold, and press in half across the length. Sew the two ends ¼” away from the edge, turn, and press. Take this and the pocket lining square and match the raw edges starting ¼” away from the corner. Pin the layers together pleating your strip as you go and stopping ¼” away from the other edge. Sew them together along the edge. Now take both your squares and layer them face sides together. The ruffle should be sandwiched in the middle. Sew around the edge with a ¼” seam allowance leaving a 2” gap on the bottom edge so you can now turn it right side out. After turning, press your pocket flat and with the face side up, place and pin it to the face side of the apron skirt shape with your appliqués. Sew closely around the left bottom and right sides.
5. Sew your pleated ruffle and apron skirt. Take your long ruffle strips and sew the ends together to make one very long strip. Then fold and press in half across the length. Match the raw edges on the face side of your apron skirt shape. Sew around the edges with a ¼” seam allowance. Now layer both your skirt shapes with the face sides together and sew along the curve stopping ½” from the top edge on both sides. Turn the skirt right side out and press flat. Fold and press the top raw edges inside ½”.
6. Sew the waistband and finish! Gather your waistband strips you cut and sew the ends together to make another long strip. Fold and press this strip in half across the length. Then unfold it and take the outer raw edges, fold in towards the center crease, and iron flat. Fold it back in half at the first crease you made and, iron flat once more. Now sew closely along the edges tucking the width ends in to hide the remaining raw edges. Find and mark the middle of your strip and the top of your apron skirt. Slide the waistband between the two layers matching the middle and sew closely along the edge to finish.
We would love to see your latest creations and hear any ideas you may have for my next project or tutorial. Share your aprons and ideas with me online!
Enjoy your latest project!
Crafter’s Edge