By: Xappa
Hello fellow Crafters!
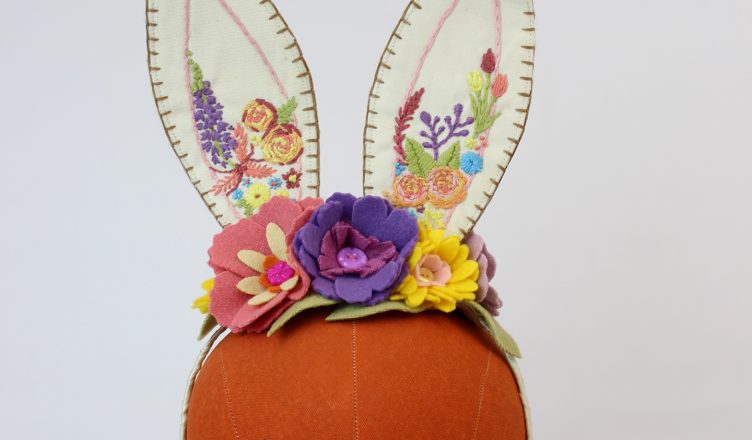
We are closing in on April and we wanted to share some cute items for your Easter basket. Growing up, my folks would put toys, coloring books, crayons, games and stuffed animals in our baskets to ease up on the candy. I was bummed out that I didn’t get one of those gigantic chocolate bunnies, but it more than made up for it that I was able to color and play with toys long after my cousins sugar highs were over. This craft is a verrrry small foray into millinery. If you’re not familiar with millinery, you should definitely do yourself a favor and do some googling. You know those fancy hats the royal family wears to special occasions? Millinery. You know those crazy fascinators and huge hats folks wear to the Kentucky Derby? Millinery. Bridal fascinators, bridal combs, bridal headbands? Millinery, millinery, millinery. Its a very beautiful art-form with a very strict discipline and something I’ve enjoyed doing for years. This project takes some of the techniques and simplifies them A LOT.
Now, when I say a lot I mean, how many hours are you trying to spend on these? You know what I’m saying? You do. You definitely do. These ears are accented by a colorful flower crown as well as some embroidery. I used a soft color palette to make it as spring-y/Easter-y as possible and added wire to the ears for stability and to make them versatile in how the wearer might want to position them. Remember, you can always simplify any of the steps to make them your own. If you leave the wire out, I suggest adding something lightweight and stiff to keep the ears standing upright like, buckram or some other super stiff interfacing.
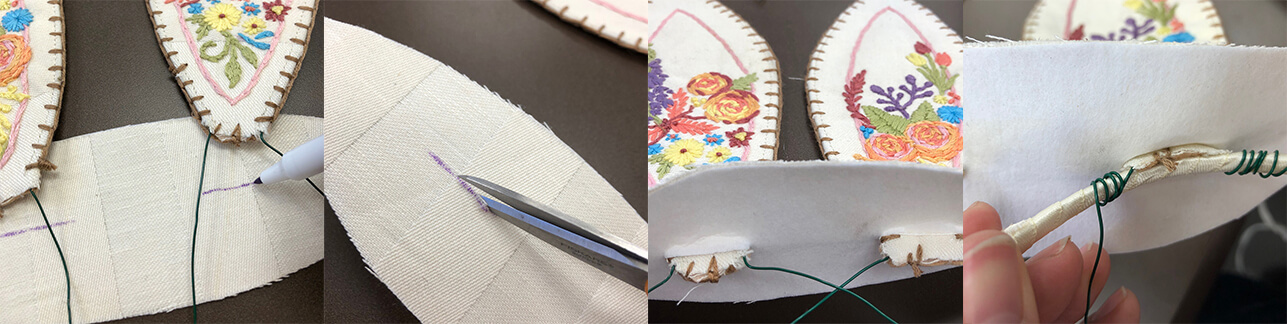
1. Select the fabric for your bunny ears and your headband base. You will need 4 pieces of fusible interfacing (For front and back), 4 pieces of fabric for the ears (For front and back), and 2 pieces of fabric for your headband base (For the top and underneath).
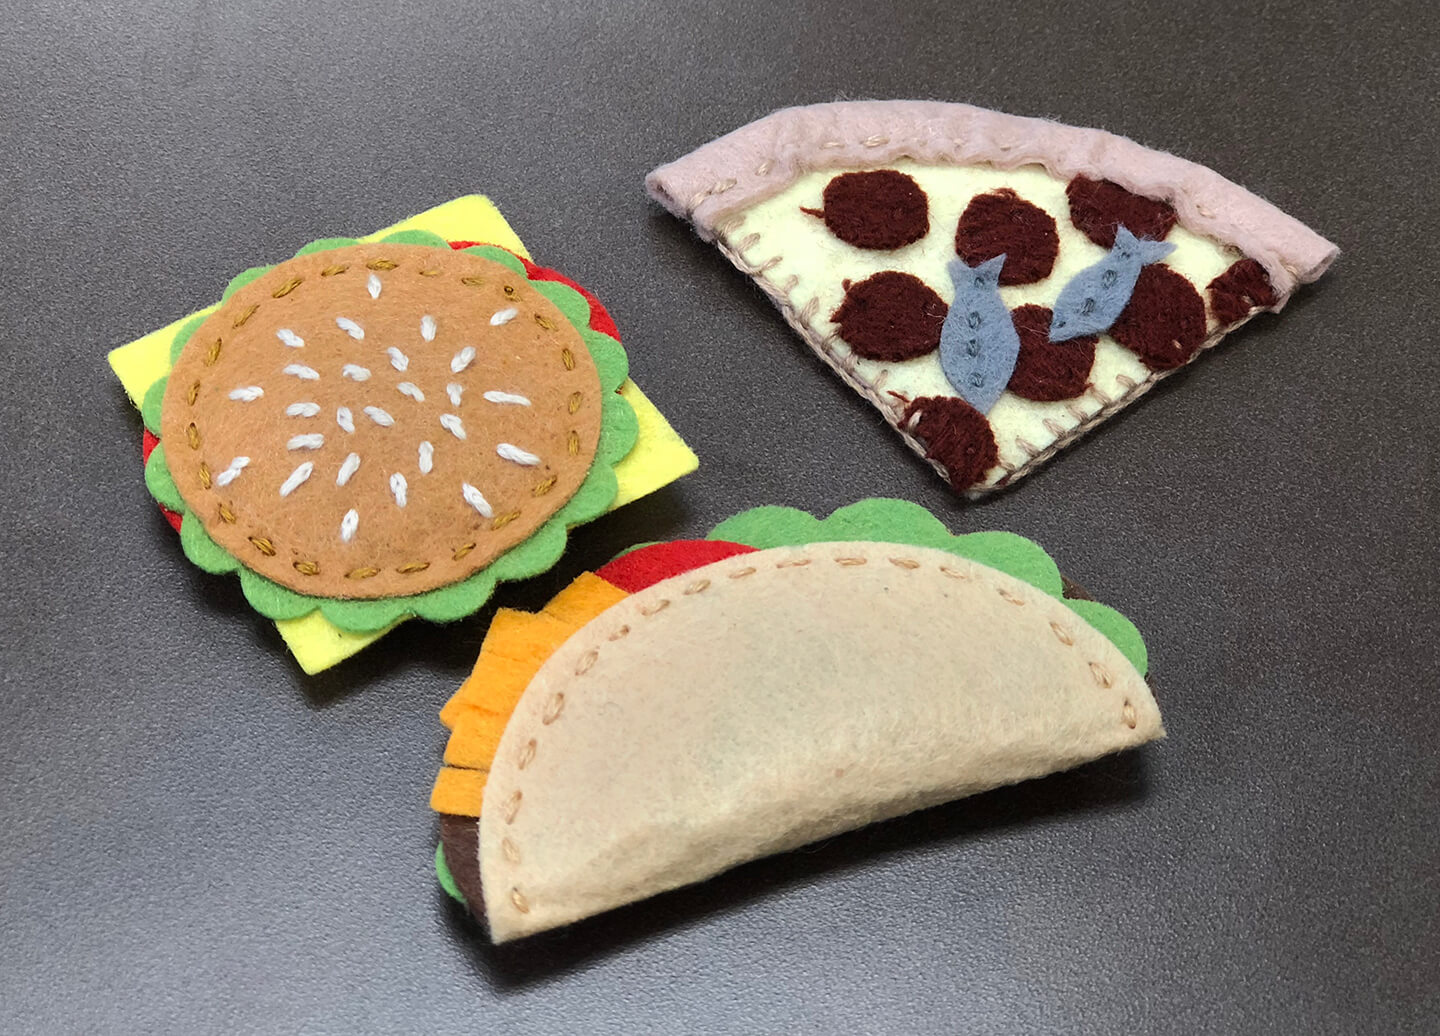
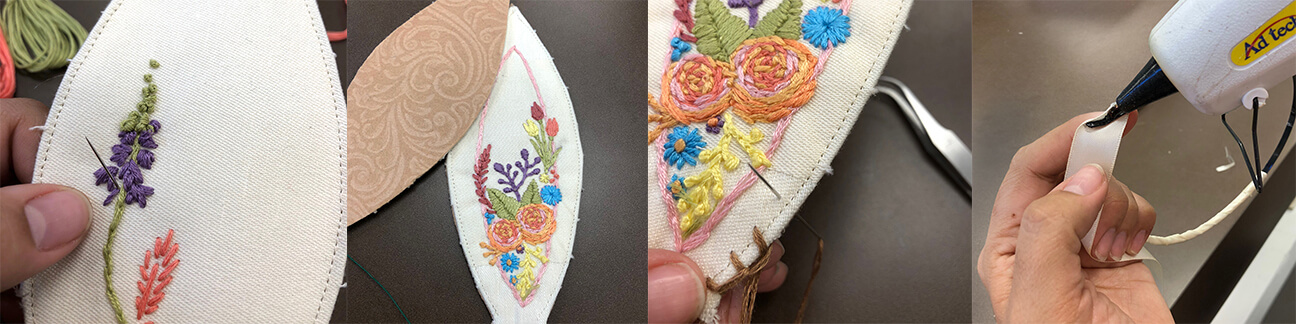
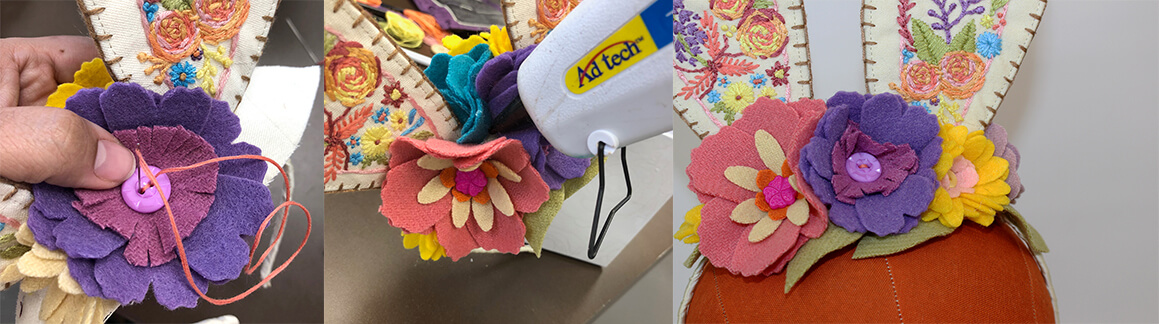
Using my machine, I cut my interfacing with my large beach ball fab die, then ironed it to my fabric and cut around the interfacing leaving a half inch of seam allowance for the wire. Cut out your headband base shape (this will be what the ears go into and what the flowers get sewn to), I think if I did it again I would just use the smaller beach ball die. I cut all my flowers and leaf shapes out of felt using the dogwood flower fab die set and a few different hand drawn patterns. I thought it would look better with all of the different textures and shapes next to one another. You can do whatever you want with your flowers.
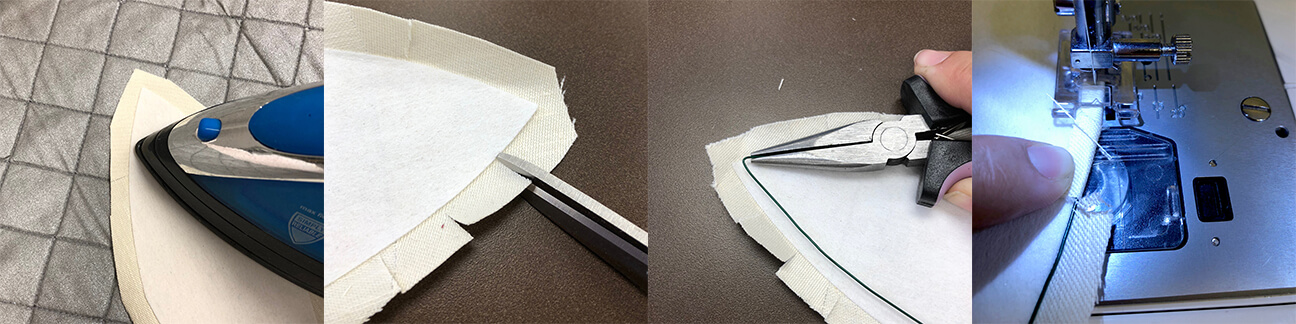
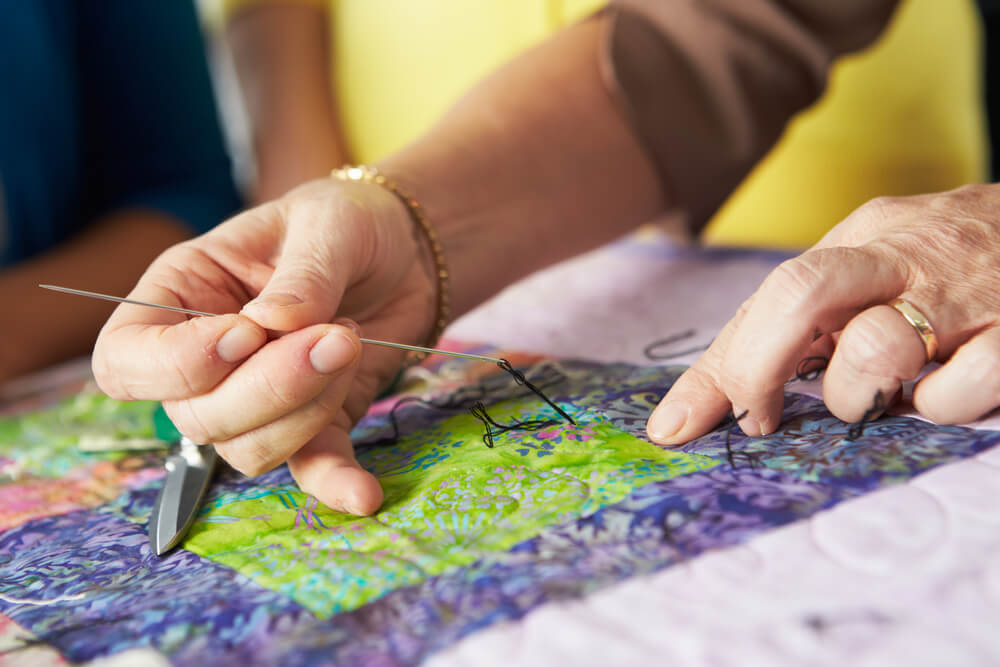
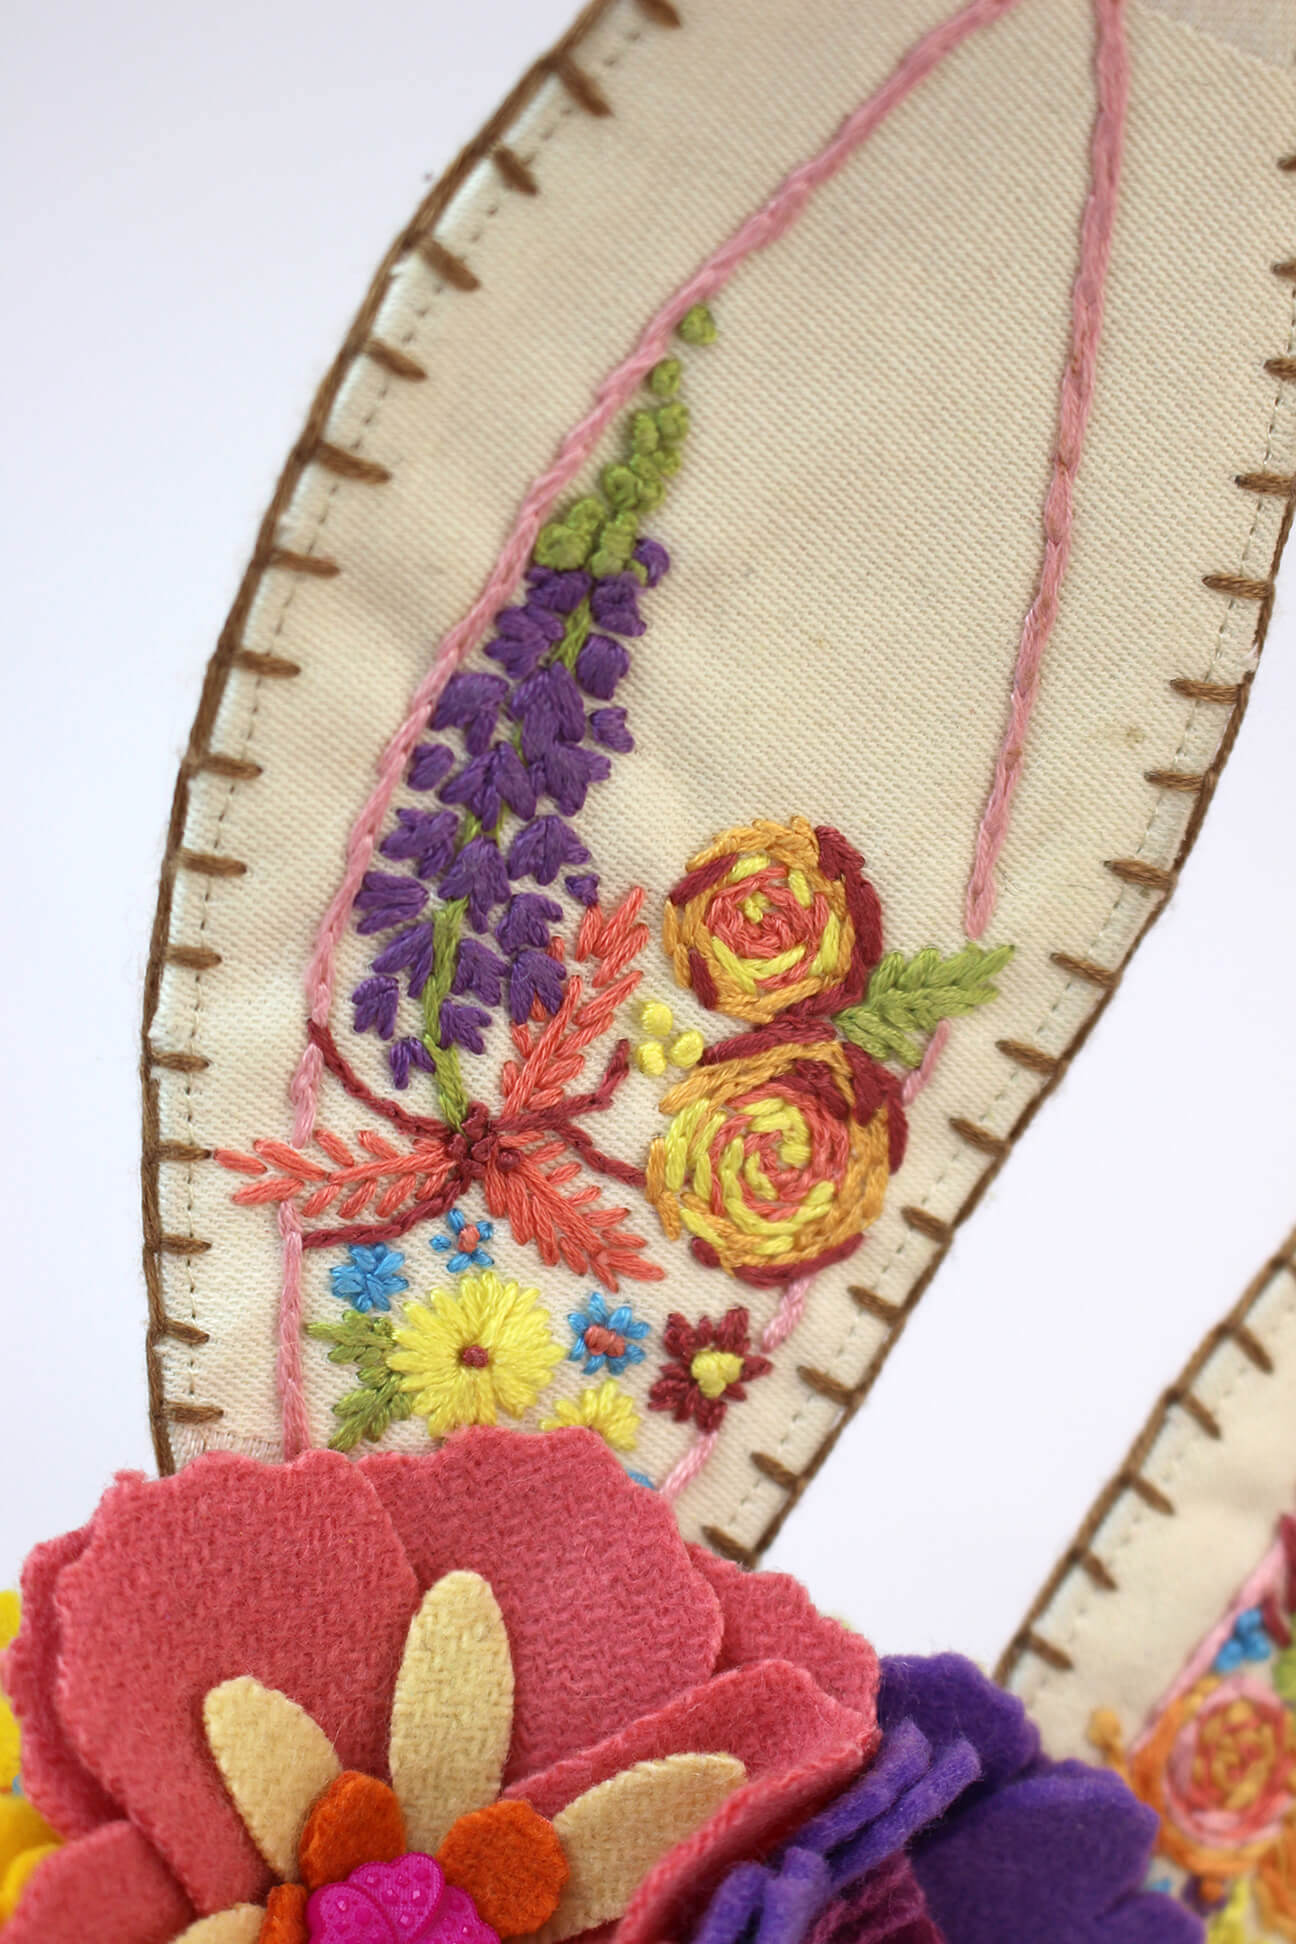
2. Snip around your ear shape to allow for better curves. Using your pliers, mold your wire to the outside edge of your interface leaving about 4 inches of excess on the ends for wrapping. Carefully sew the wire in place folding over each section of snipped fabric as you go. You can now start on your embroidery/embellishments. Once you’ve embroidered your ears, add your backing fabric (I used some textured felt) and finish it off with a blanket stitch and set aside.
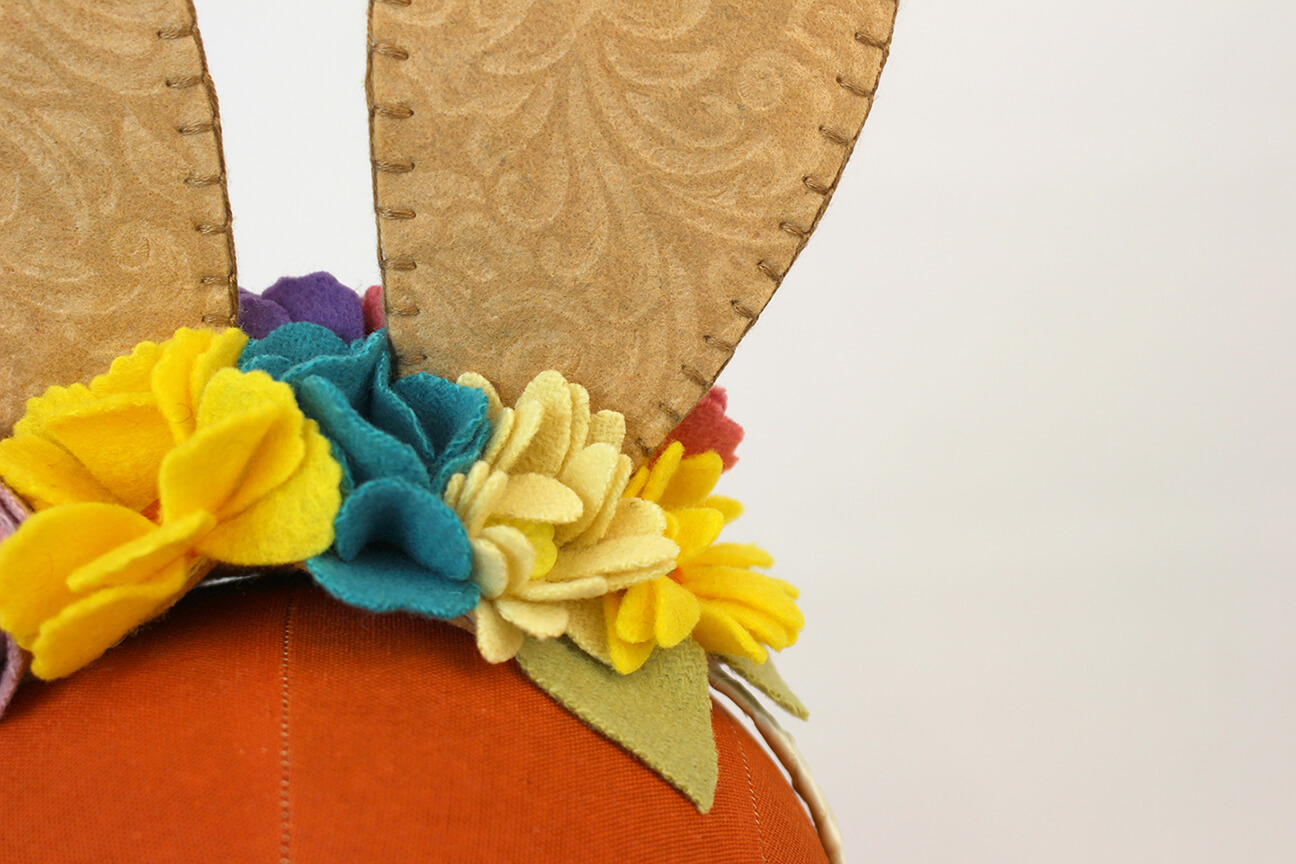
3. Wrap your ribbon around your headband. I started on one side, alternating between making a small line of hot glue and wrapping the ribbon then stopped once I got to the top of the headband, cut my ribbon and then did the same for the opposite side. I did this so my headband ends looked nice and clean and I didn’t have to try to tuck it in on itself or sew it into place. Since the top of the headband will be covered by the ears and flowers, I thought this would be the easiest way to do it. On your head band base fabric, mark where you want your ears then cut with your scissors and pull through. Wrap the wire around your headband to secure.
4. I attached my flowers to the top of the headband base fabric using embroidery thread and buttons. Once I was done, I sandwiched the metal headband between the top and bottom base and secured it using the hot glue. I went ahead and added a little bit of glue between the flowers for a little more stability.
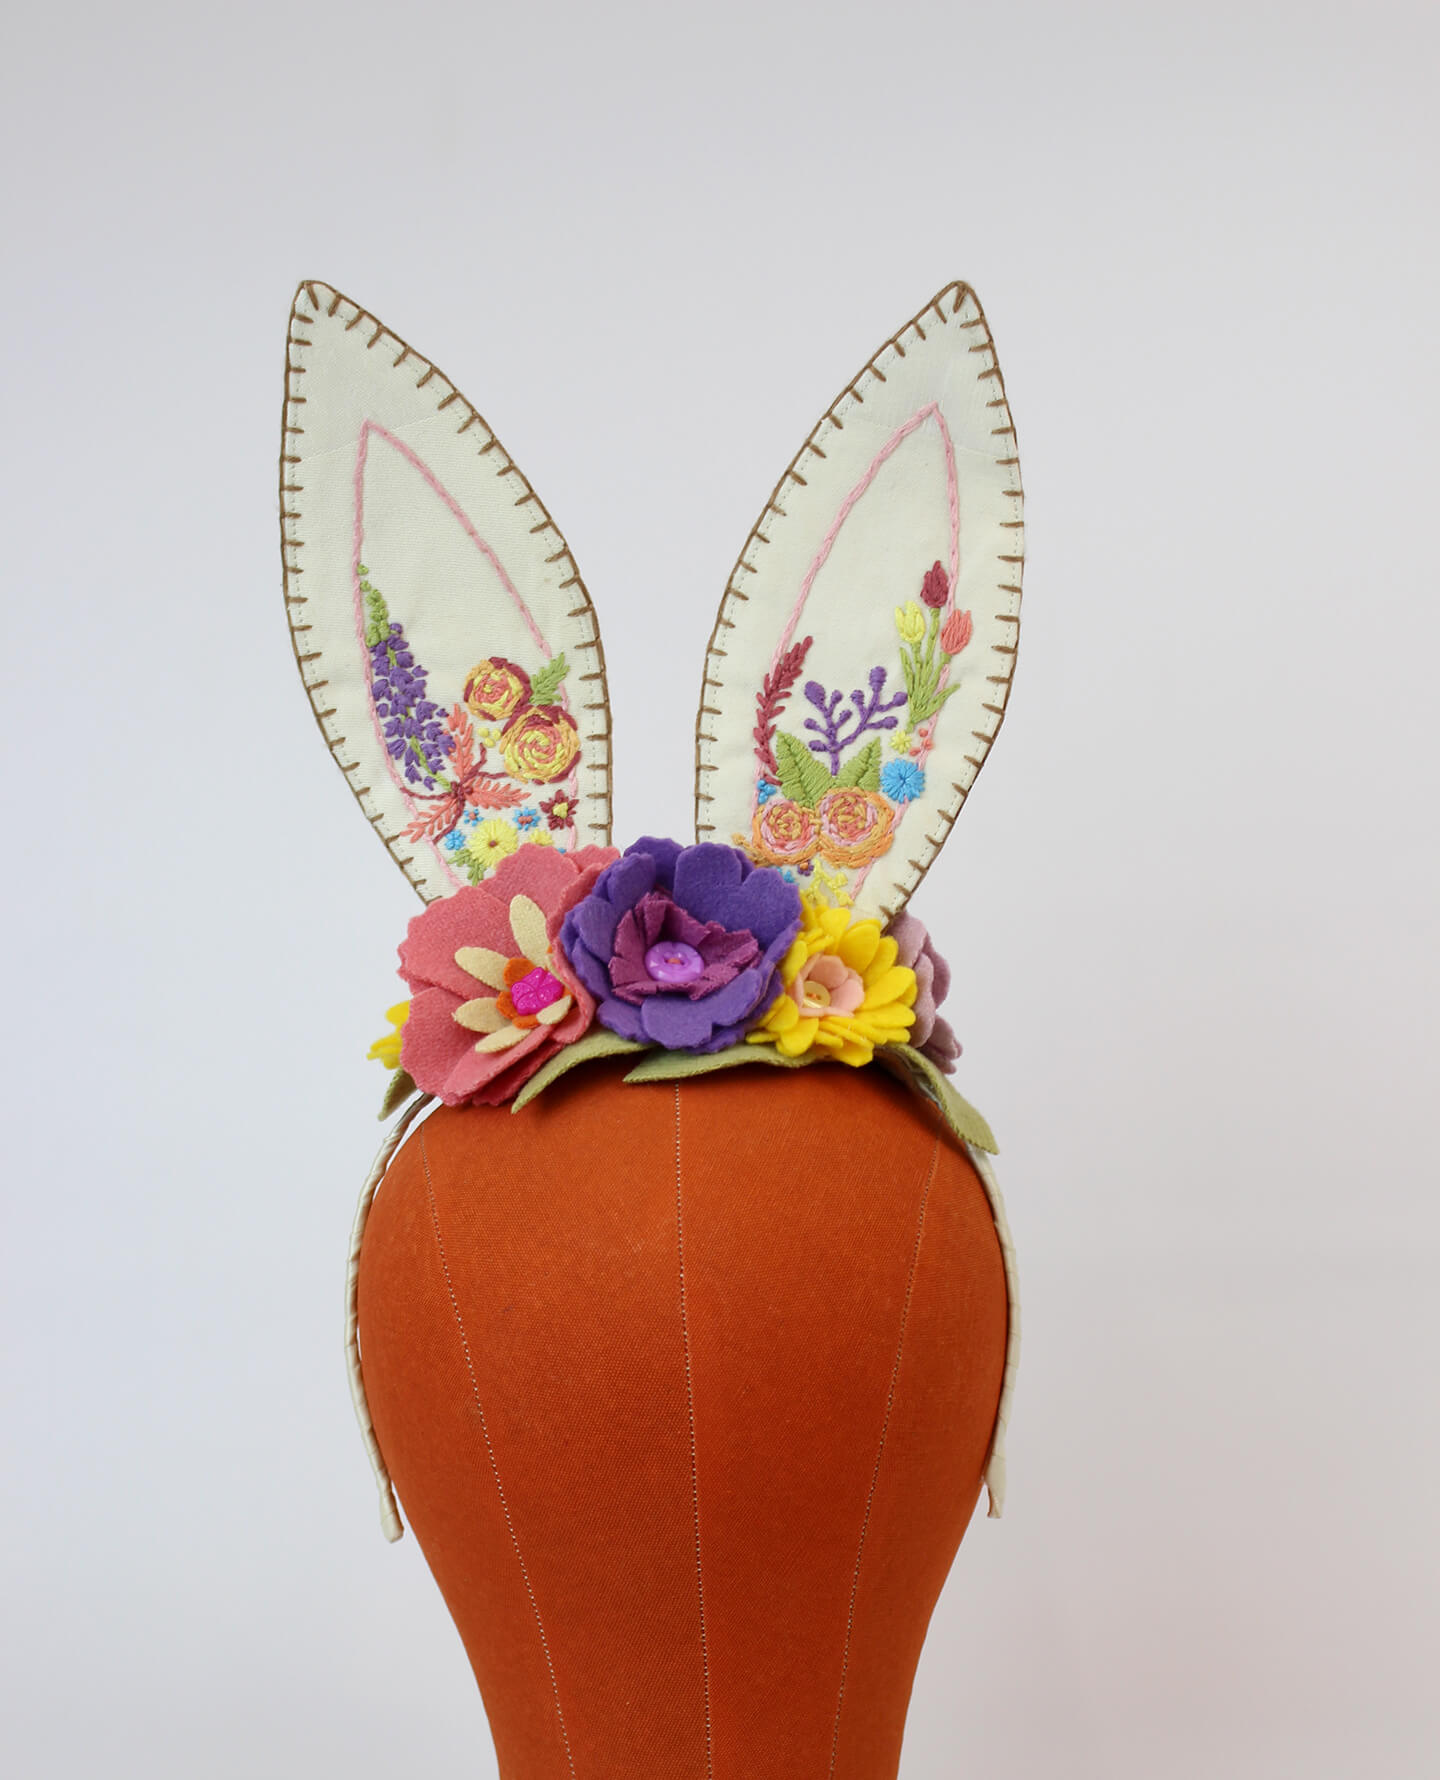
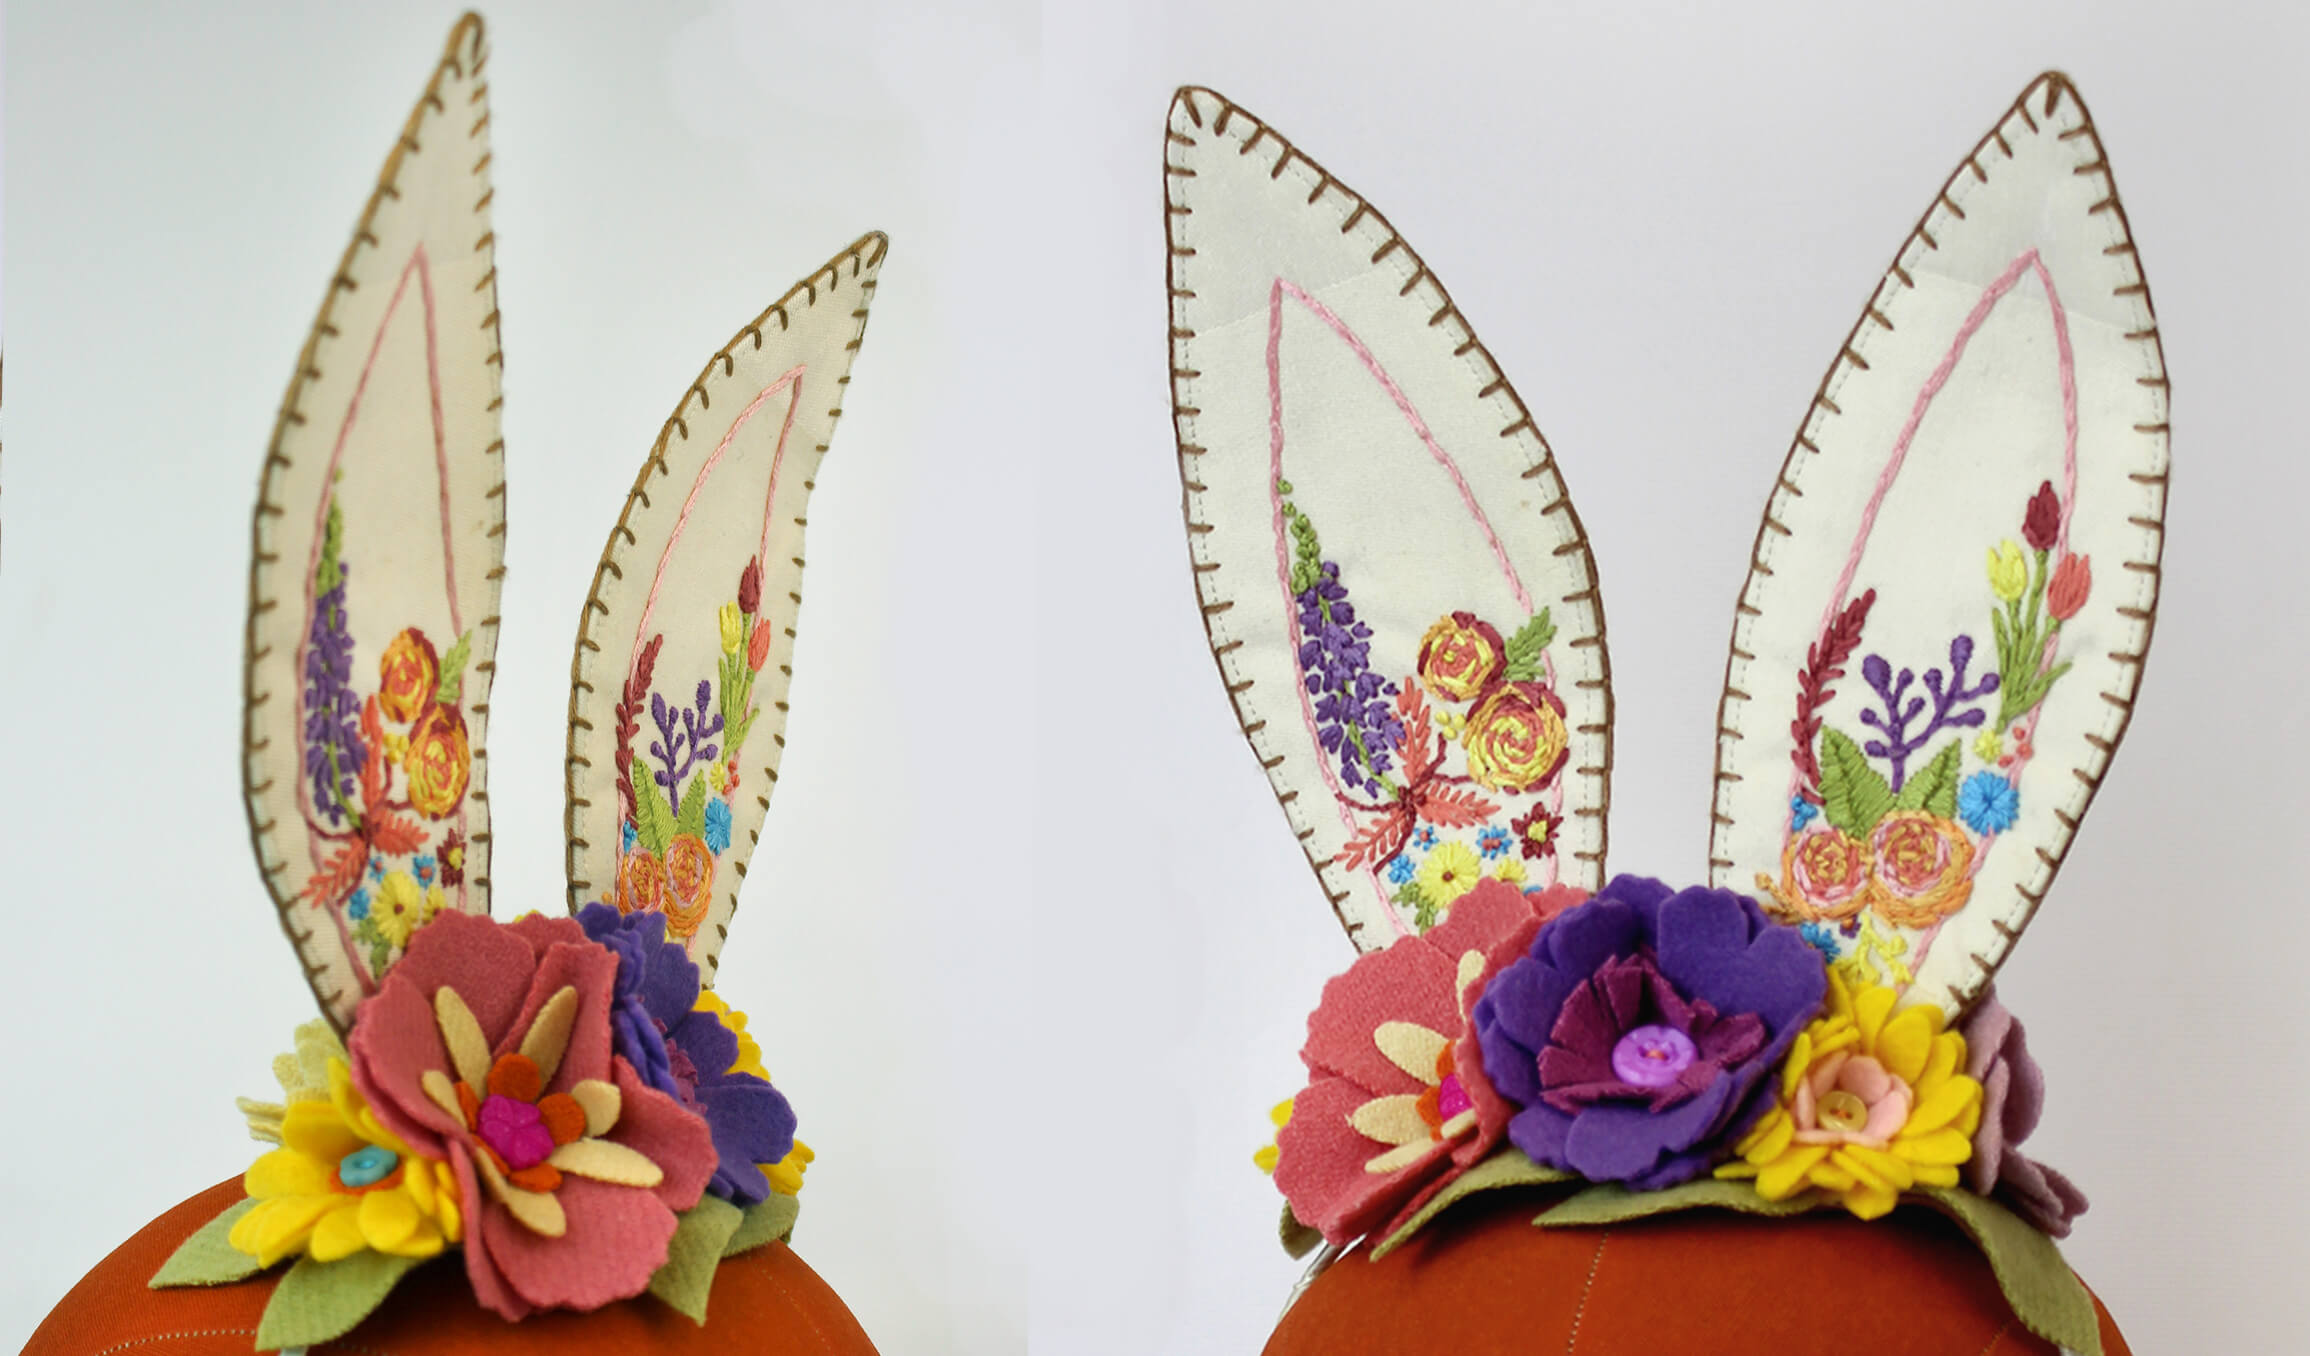
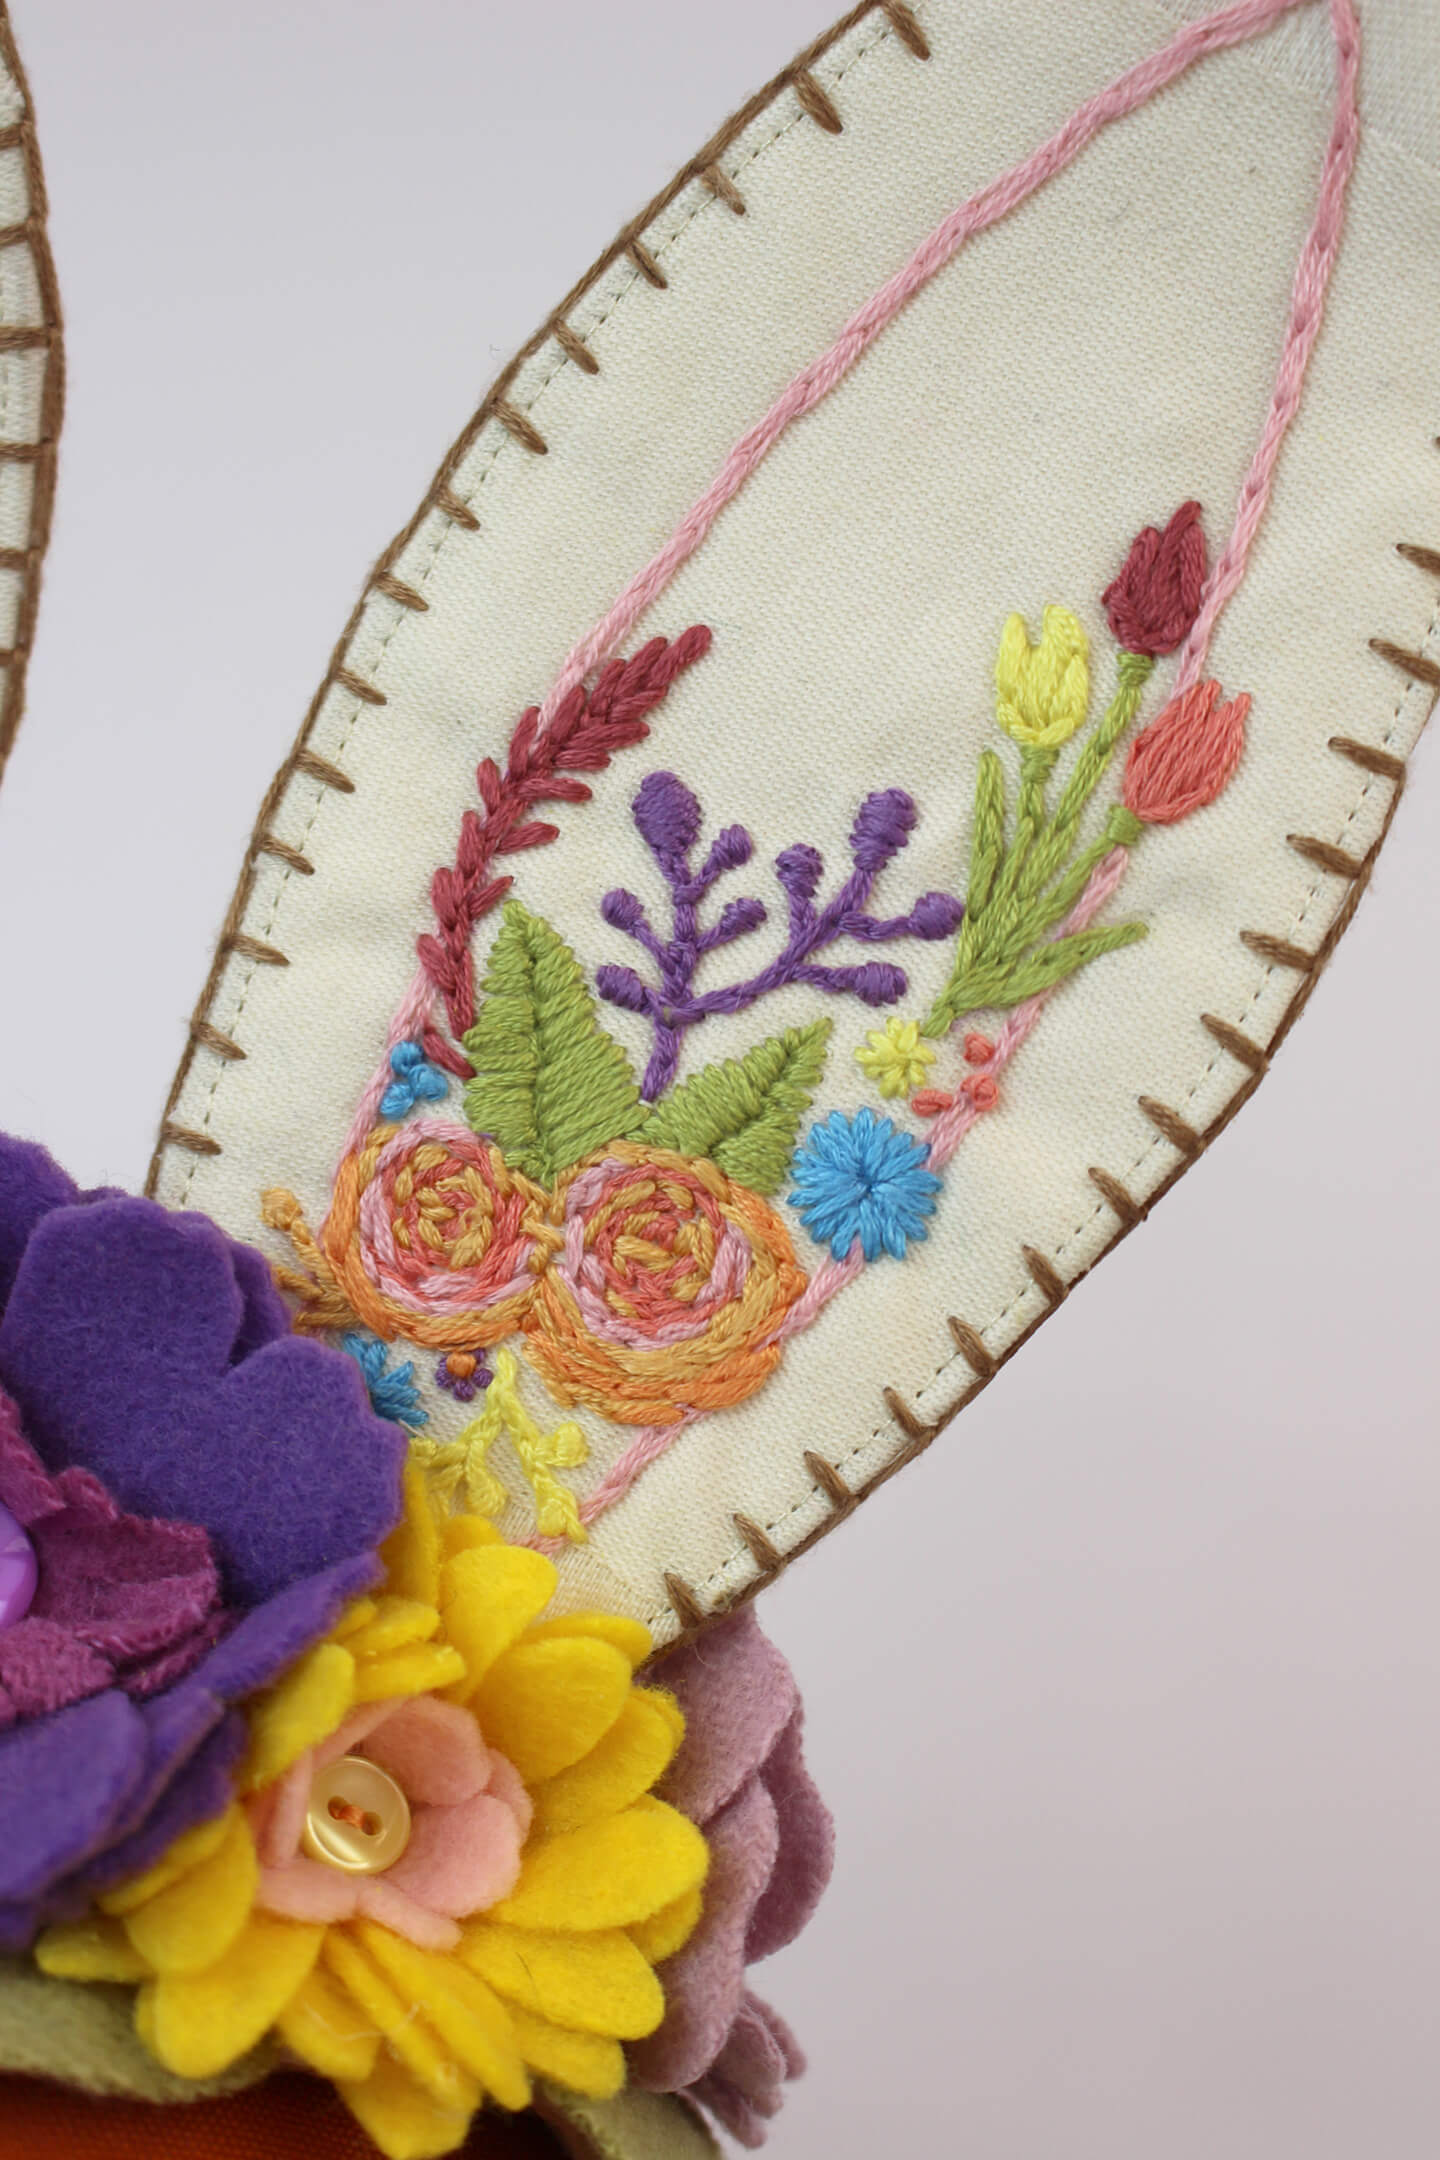
Some close up shots of the embroidery detail. I used an upholstery fabric so the texture of the embroidery would be the main focus with little fraying.
The back.
So, there you have it. I went super crazy with the detail because I’m a ridiculous person who likes to do frustrating things, but I’m sure the same could be done with the smaller beach ball die and a simpler embroidery/no embroidery at all. You can keep the flowers or leave them off or…just add one or two…or do a bow…or do the smaller beach ball die and a horn in the middle and make a unicorn! Use that lovely imagination of yours and definitely tag us in your creation.
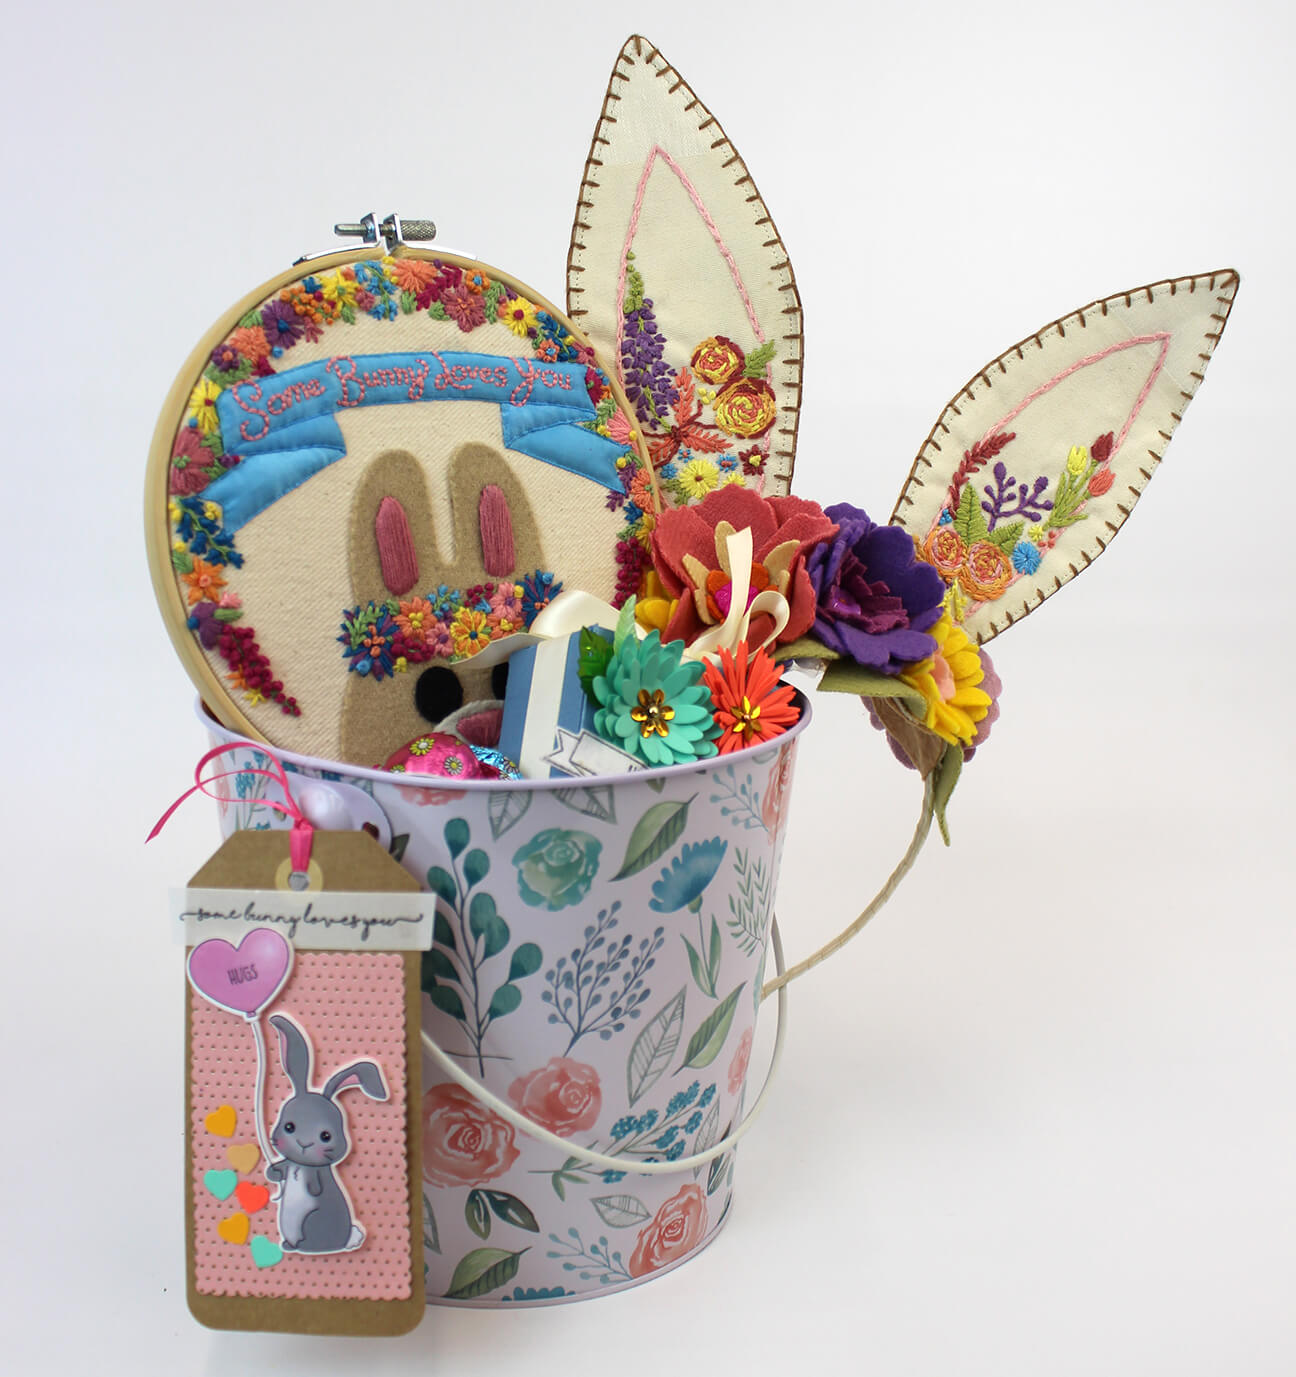
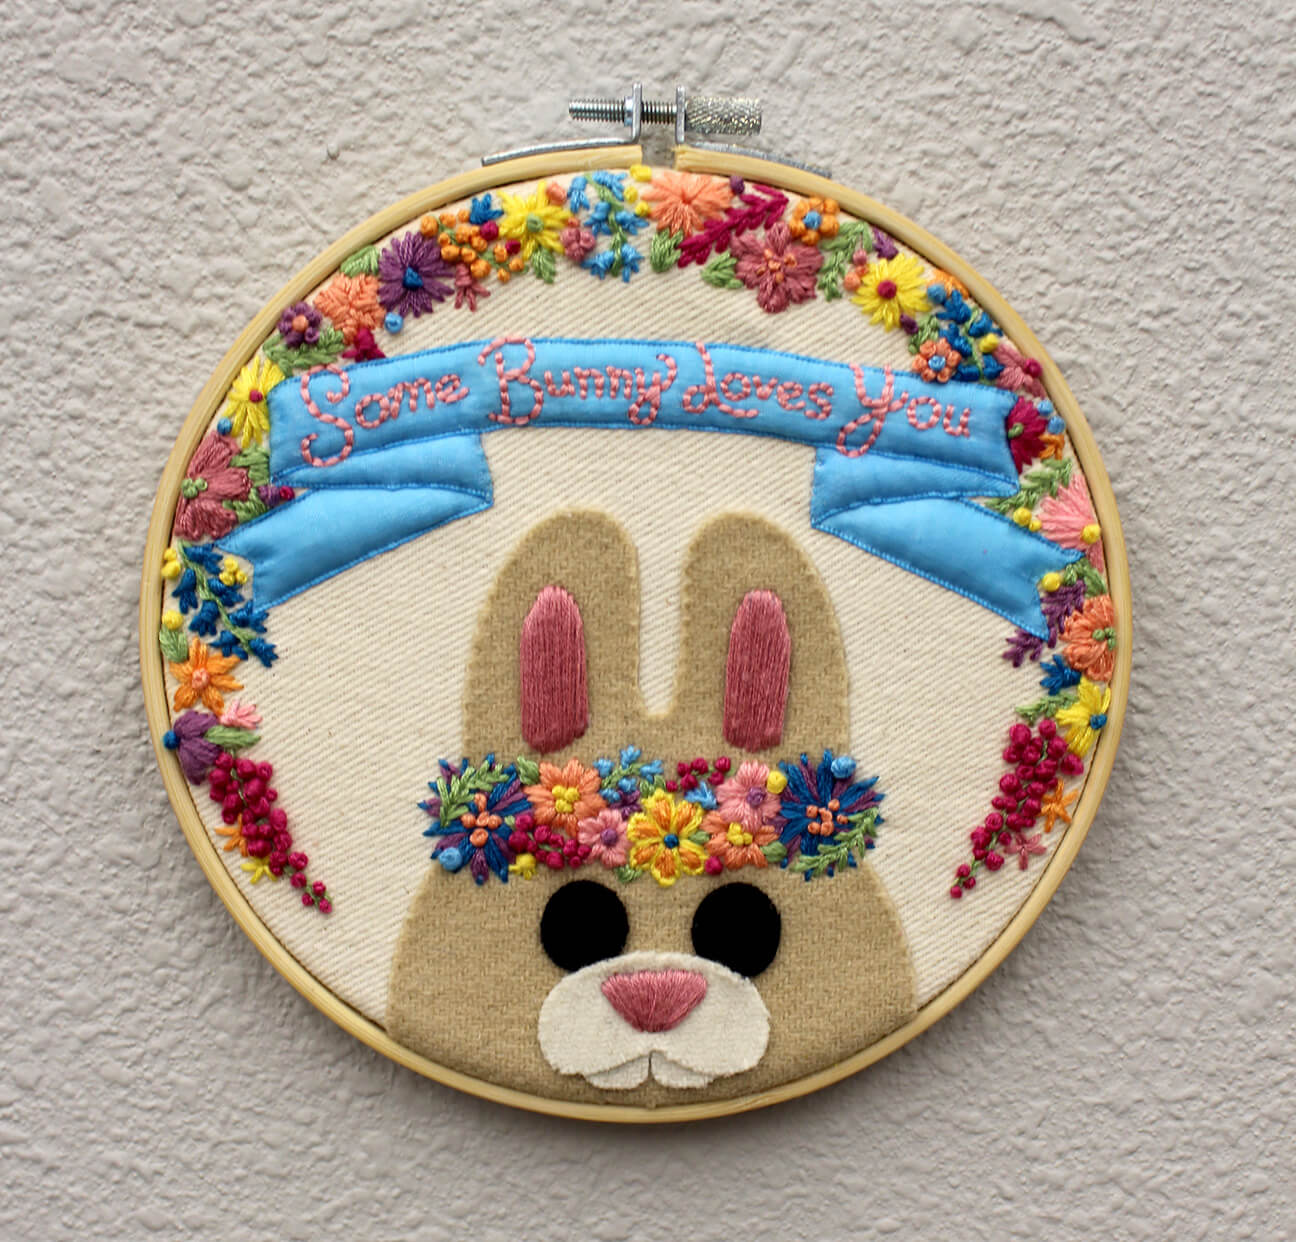
Here’s a look at the final Easter Basket with some other handmade things, including paper crafted treat boxes and an embroidered art piece by Randi. Some bunny loves you was our theme. Stamped bunny die set coming soon from our new line. Keep an eye out for that launch!
Thanks for looking and I hope you have a lovely week!
Your friend in crafting,
Xappa