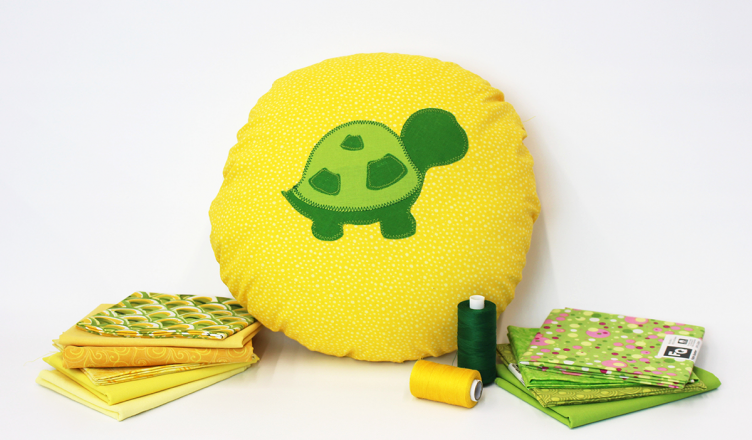
This pillowcase is absolutely adorable! Enjoy! Full PDF download here.
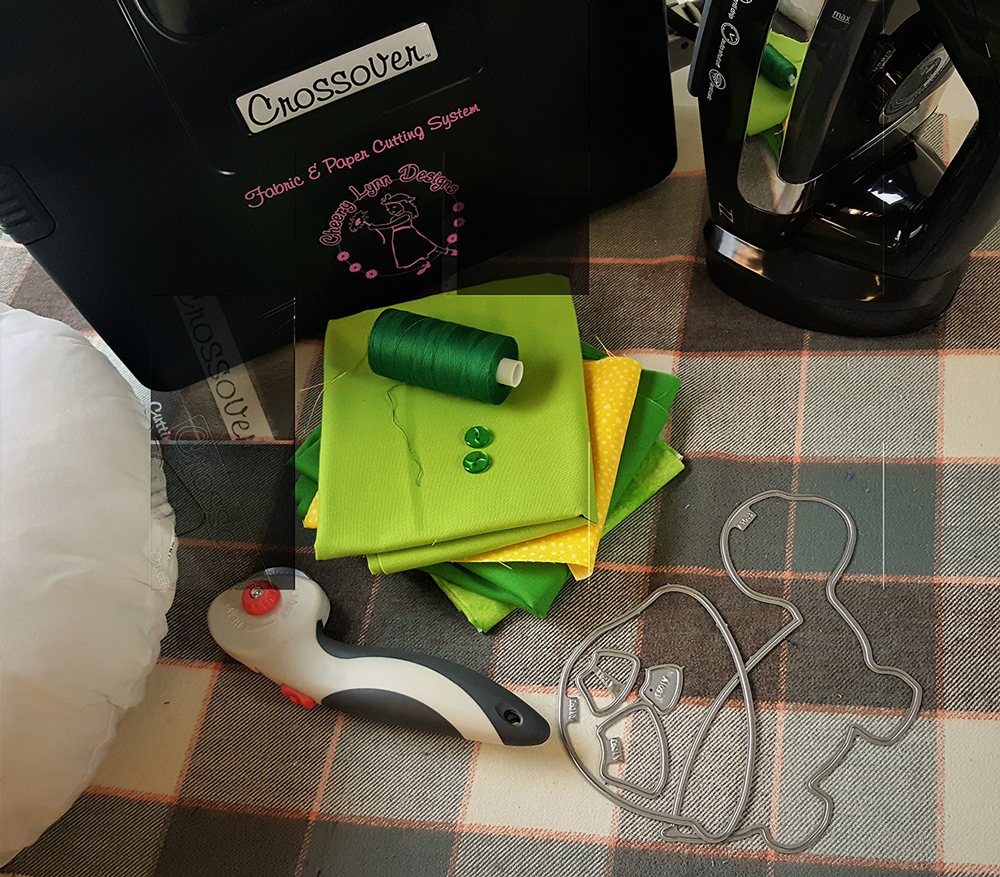
Supplies:
»» Die Cutting Machine
»» Cotton Fabric
»» A1093 Fab Die Set
»» 3 Buttons
»» Round pillow
»» Marking Chalk
»» Iron
»» Measuring Tape
»» Fusible Web
»» Sewing Machine
»» Thread to Coordinate or Match with Your Selected Fabric
Instructions:
1. Select and cut your fabrics for your pillowcase. Measure the diameter of your pillow, seam to seam. Add half an inch to that measurement and draw a circle on your selected fabric with that diameter for the front side of your pillowcase. For the back, fold your circle in half, place on your fabric, and trace around it. Add one inch on the straight side of your circle (to fold over for the closure). Cut two separate pieces for the back side of your pillow.
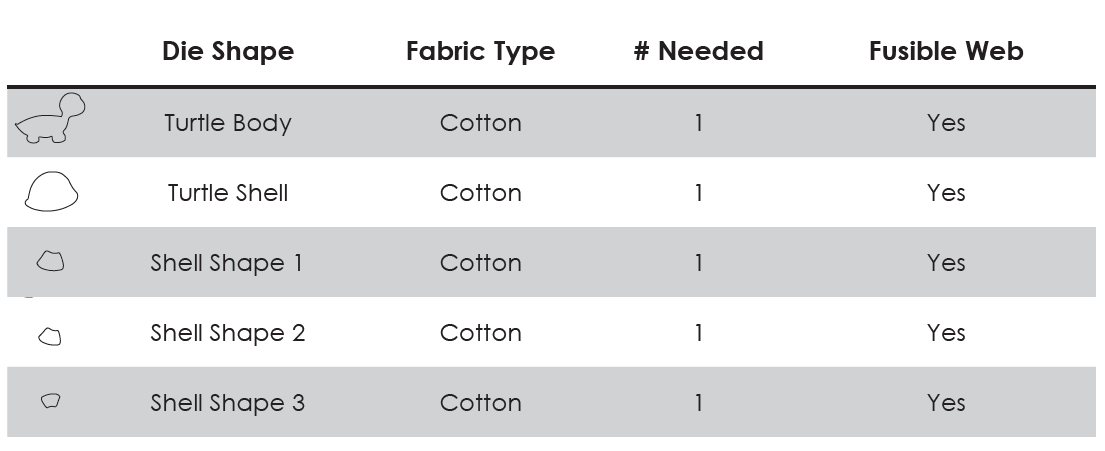
2. Select and cut your fabrics for your turtle. Now that you have your pieces cut for your pillowcase, you can prepare the turtle appliqué. Refer to the chart below for fabric and fusible web needs. Cut your fabric and fusible web to roughly the size of the die. Place the flat side of the die on the white base plate and your fabric/fusible web layers on top of the die. Put the metal plate on top of your fabric and sandwich it all together with the clear-cutting plate. Adjust the roller width on your die cutting machine as needed and roll the plate through the machine twice (forward and back one time each).
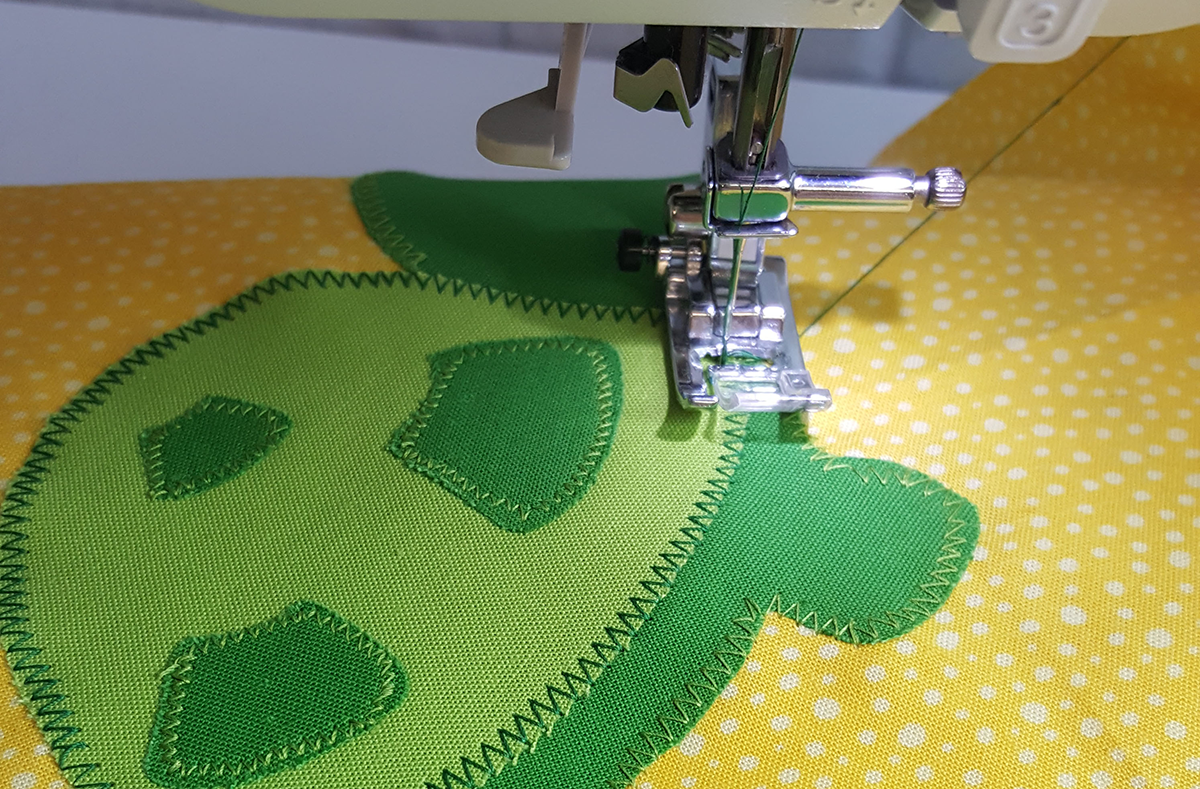
3. Arrange, iron and sew appliqué. Layer your turtle appliqué shapes with fusible web underneath and arrange onto the front side of your pillowcase. Iron for 10 seconds on medium heat to activate fusible web. Secure turtle appliqué with a small zig-zag stitch.
4. Create button holes. Take your two halves for the back of your pillowcase and fold the straight side in by 1/2 inch twice on each piece, iron flat and sew. On one of the halves make three button holes along the straight edge.
5. Sew your pillowcase. Pin the two back pieces of your pillowcase face down on top of the front of your pillowcase right sides together, aligning the outer edges.
• Note: The two back pieces should slightly overlap. Place the fabric piece without the button holes on top. Sew your pieces together along the outer edge of the circle.
6. Add buttons and finish! Turn your pillowcase right side out and add your buttons to finish your pillowcase. Now the fun part, put your round pillow into your new turtle pillowcase.
I would love to see your latest creations and hear any ideas you may have for my next project or tutorial. Share your turtle pillowcase and other ideas with me online!
Enjoy your latest project!
-Randi